Performer Calendar
The performer calendar allows you to define working time profiles for objects of class "Performer". This calendar is evaluated by the "Workload Analysis" and specifies, for a one year period, the presence of a performer.
Hint
The performer calendar is a standardised calendar. This means that it does not refer to a specific year and that it comprises 365 days. Leap years are not considered and the first day is always a Monday, the 1st of January.
Open the calendar by clicking on the button "Calendar" in the "Simulation data" chapter of the ADOxx Notebook of an object of class "Performer".
The window "<performer's name> - Calendar" appears.
Display Performer's Calendar
The window "<performer's name> - Calendar" shows the current working time profile of the performer selected. The default setting for the class "Performer" is that Monday to Friday are working days, Saturday and Sundays are days off (bank holidays, vacation etc. are not taken into account).
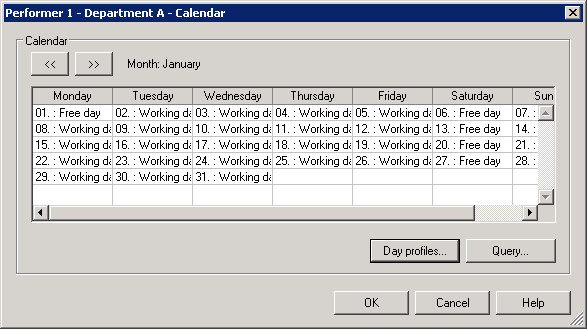
The working time profiles are displayed for one month. You can show the previous and following months by clicking on the buttons "<<" or ">>" respectively. The name of the current month is shown to the right of the two buttons.
If the names of the day profiles are too long to fit in the standard column width of the calendar, you can adjust the column width accordingly. Double-click on the column's header (e.g. "Monday"). The width of the corresponding column will be set in such a way that all day profile names fit into the column.
Click on the OK button to close the calendar and to confirm the changes made.
In addition to the existing day profiles "Working day" and "Free day" you can define new day profiles and change or delete existing profiles. By clicking on the "Day profiles" button, the window "Day profiles" listing all available day profiles will appear.
Click on the button "Query" if you wish to calculate the actual availability of the performer.
Calendar - Displaying Day Profiles
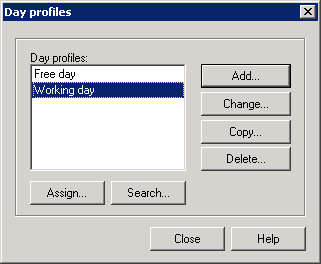
The window "Day profiles" enables you to:
- Add new day profiles.
- Change existing day profiles.
- Copy day profiles from other objects of the class "Performer" - also from other models.
- Delete existing day profiles.
- Assign existing day profiles to days or periods of time.
- Search for days to which day profiles have already been assigned.
Calendar - Adding Day Profiles
You can add new day profiles by clicking on the button "Add" in the window "Day profiles" . The window "New day profile" opens up, into which you must enter a unique name for the new day profile (a name which has not yet been used for another day profile).
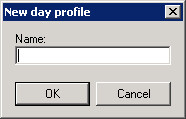
Click on the OK button or press the enter key to continue the process. Clicking on the "Cancel" button closes the window and returns to the window "Day Profile".
Once you have entered a unique name for the day profile to be added and clicked on the OK button, the window 'Day profile "<name of the day profile>" - time intervals' appears.

Click on the "Add" button and enter the start and end time of the interval in the window "New interval".
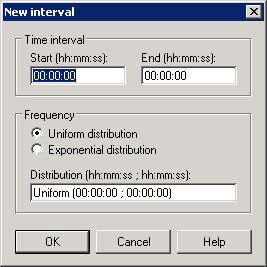
Please make note of the following points when entering the interval:
Time intervals must be entered in the time format "hh:mm:ss".
The starting time must be earlier than the ending time.
If more than one time interval is defined for a day profile, the intervals may not overlap.
After entering the interval, click on the OK button to copy the new interval to the list of working times in the window 'Day profile "<name of the day profile>" - to copy time intervals'.
Calendar - Changing Day Profiles
If you wish to change an existing day profile, select the appropriate profile in the "Day profiles" window and then click on the button "Change". The window 'Day profile "<name of the day profile>" - time intervals' appears, showing the intervals already defined in the field "Working intervals".
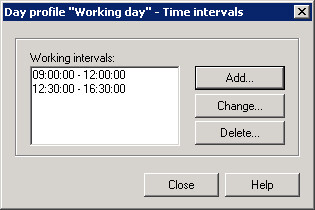
If you wish to change an interval, select the interval to be changed and then click on the "Change" button.
Enter the new starting time and/or the new ending time in the window "Change interval".
Please make note of the following points when entering the interval:
Time intervals have to be entered in the time format "hh:mm:ss".
The starting time must be earlier than the ending time.
If more than one time interval is defined for a day profile, the intervals may not overleap.
After entering the interval, click on the OK button to copy the new interval to the list of working times in the window 'Day profile "<name of the day profile>" - to copy time intervals'.
To delete an interval, select the appropriate interval in the window 'Day profile "<name of the day profile>" - time intervals' and click on the "Delete" button.
A message asking you if you really wish to delete the time interval appears.
Calendar - Deleting Day Profiles
If you wish to delete an existing day profile, select it by a mouse click in the window "Day profiles" and then click on the button "Delete".
A window appears, in which you have to confirm that you really wish to delete the day profile selected.
Click on the "Yes" button to continue deleting the profile. Click on the "No" button to stop the process.
Calendar - Assigning Day Profiles
You can assign the day profiles defined to certain days and/or periods of time. There are two ways to do this:
For a certain day.
For certain days of the week and/or periods of time during a year.
In order to assign a day profile to a specific day, double-click on the particular day in the window "<performer's name> - Calendar". The window "<Date>", showing the current day profile and the available (assignable) day profiles, are displayed.
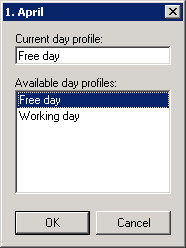
Select the day profile to be assigned from the list "Day profiles" and click on the OK button. The selected day profile will then be assigned. Clicking on the "Cancel" button cancels the process.
If you wish to assign a day profile to certain days of the week and/or periods of time during a year, select the day profile to be assigned in the window "Day profiles" and then click on the "Assign" button. The window "<name of day profile>" - assign to days opens.
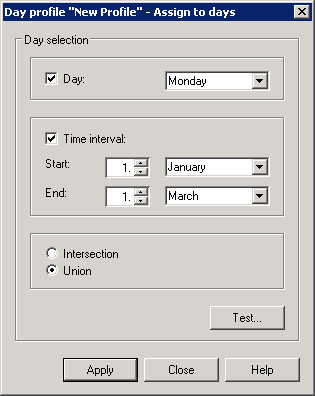
Activate the option "Day" and choose the day that you want to assign the day profile to. If you click on the OK button, the current day profile is assigned to all days (within the year) of the type selected.
You can define a period of time by selecting the option "Time interval". After you have entered the period, click on the OK button to assign the current day profile to all days within the period selected.
In addition, you can form a set of days the current day profile will be assigned to by activating the options "Day" and "Time interval". The following options are at your disposal:
Intersection: AND operator (standard setting); All days identical to the day of the week selected within the period defined will be determined (e.g. all Fridays from March, 1st to April, 30th).
Union: OR operator; All days identical to the day of the week selected or within the period of time specified are determined (e.g. all Fridays of a year and all days from March, 1st to April, 30th).
After you have selected the day of the week, entered the period of time and the chosen operator, click on the "Apply" button to update the days in the calendar.
A preview of the days selected can be seen before you assign the current day profile to those days. Click on the "Test" button to call this preview.
Calendar - Show Specified Days
A preview of the days specified can be seen in the window "Specified days".
It is possible to save the content of the window "Specified days" to a file or print it out.
Calendar - Copying Day Profiles
If you wish to copy an existing day profile, go to the "Day profiles" window, select the day profile and click on the "Copy" button.
The window "Copy day profiles" appears. There you can select a reference object (specific performer, who has the same working time or the same days off) from another opened static model as well as the day profiles to be copied.
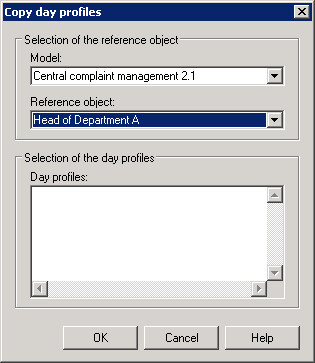
Confirm the day profile(s) to be copied by clicking on the "OK" button or close the window by clicking on the "Cancel" button.
The window "Day profiles" will appear again, containing the copied day profile.
Calendar - Searching for day profiles
If you wish to see all the days to which an existing day profile has been assigned, click on the respective day profile in the window "Day profiles" and then click on the "Search" button.
The window 'Assignment of the day profile "<name of the day profile>"' lists all days in chronological order to which the previously selected day profile has been assigned.
You can save the contents of the window 'Assignment of the day profile "<name of the day profile>"' to a file or print it out.
Calendar - Calculating the Time of Presence
The evaluation of the performer calendar enables you to calculate the time of presence (quantity of time during which a particular performer is actually available for work) of the respective performer during a certain period of time, based on the calendar defined.
Clicking on the button "Query" in the window "<performer's name> - Calendar" opens the window "Calculate time of presence".
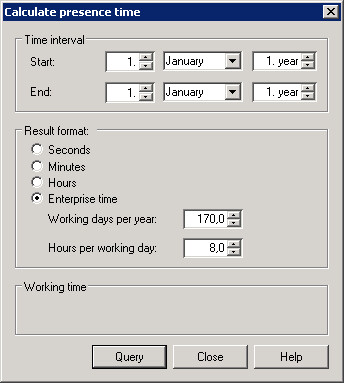
Specify the time interval and the result format and click on the "Query" button. The time of presence is shown in the format selected in the field "Working time".