Preparation
This section contains the preparation steps for packaging your modelling tool:
- If you are starting from scratch and want to implement and/or package your tool, please go to: Preparation from Scratch
- If you already have a modelling tool, which is based on ADOxx 1.5 and want to migrate to ADOxx 1.8, please use: Preparation Migration
Preparation from Scratch
This section guides you to package and publish your modelling tool. It does not contain information on how to implement with ADOxx. For further information on the implementation please refer to the ADOxx documentation or join one of the upcoming ADOxx Crash Courses.
Access to code.omilab.org
To use the packaging procedure you need access to our GitLab repository: code.omilab.org
Please register at: https://code.omilab.org/users/sign_up
Request access to the GitLab group for the
ADOxx Modelling Tool Development: https://code.omilab.org/adoxx-mod-tool-development- HINT: If you already have a project in the
modelling_toolsgroup (which is used to publish your project), you do not need access toADOxx Modelling Tool Development, but can it do directly in your ownmodelling_toolsproject. You do not need to create a new project and can continue with uploading the.gitlab-ci.ymlas described in Step 4. - This group can be used for a first implementation and packaging of your modelling tool. Information on how to publish your tool on the OMiLAB webpage, can be found at Publish your Modelling Tool.
- HINT: If you already have a project in the
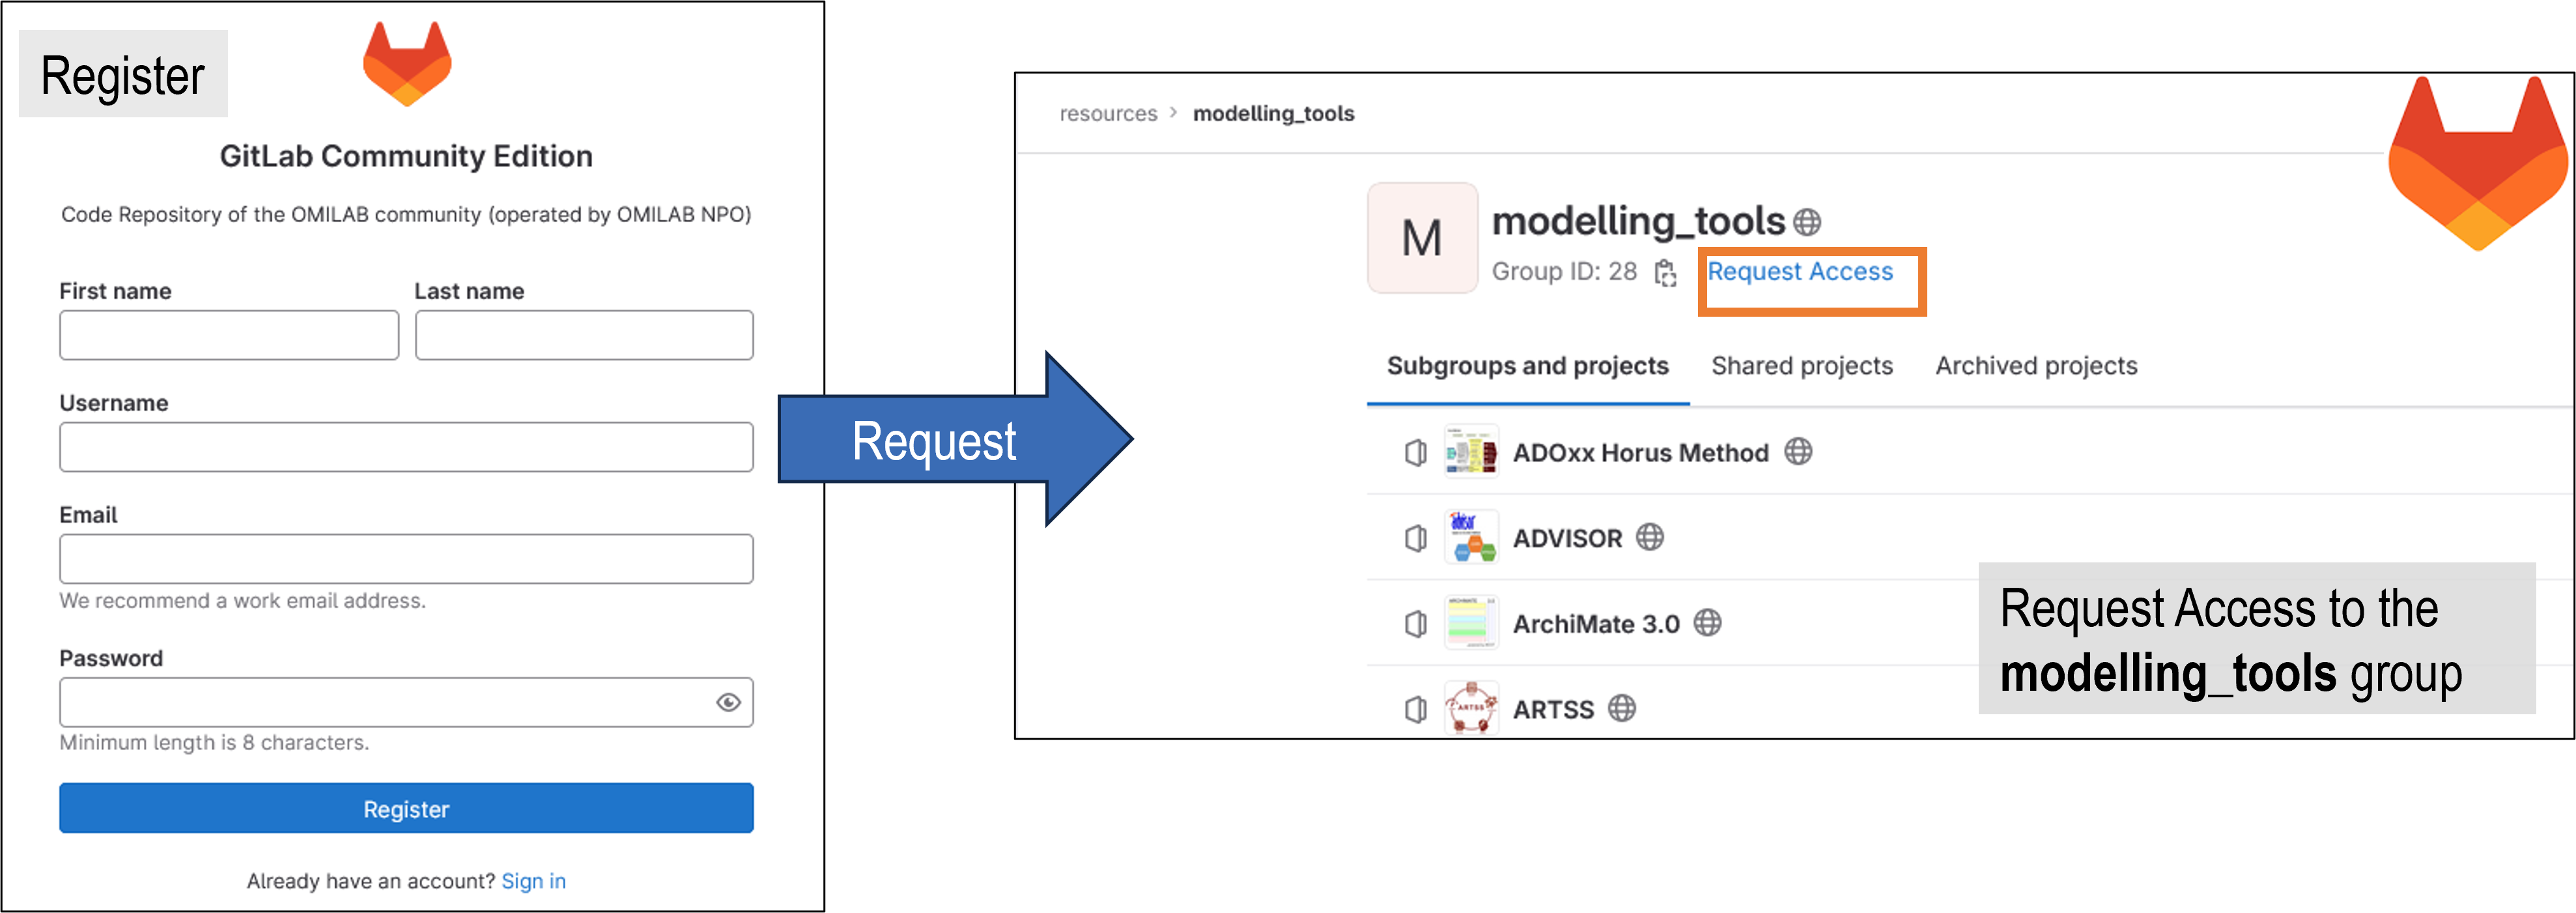 Register to code.omilab.org and request access to the ADOxx Modelling Tool Development group
- Create your blank modelling tool project within the
ADOxx Modelling Tool Developmentgroup (https://code.omilab.org/adoxx-mod-tool-development)- Click
New project - Click
Create blank project - Enter the name of your modelling tool, as your project name
3a.Check if theProject slugwas automatically set, if not provide it - Uncheck the box for
Initialize repository with a README - Click
Create project
- Click
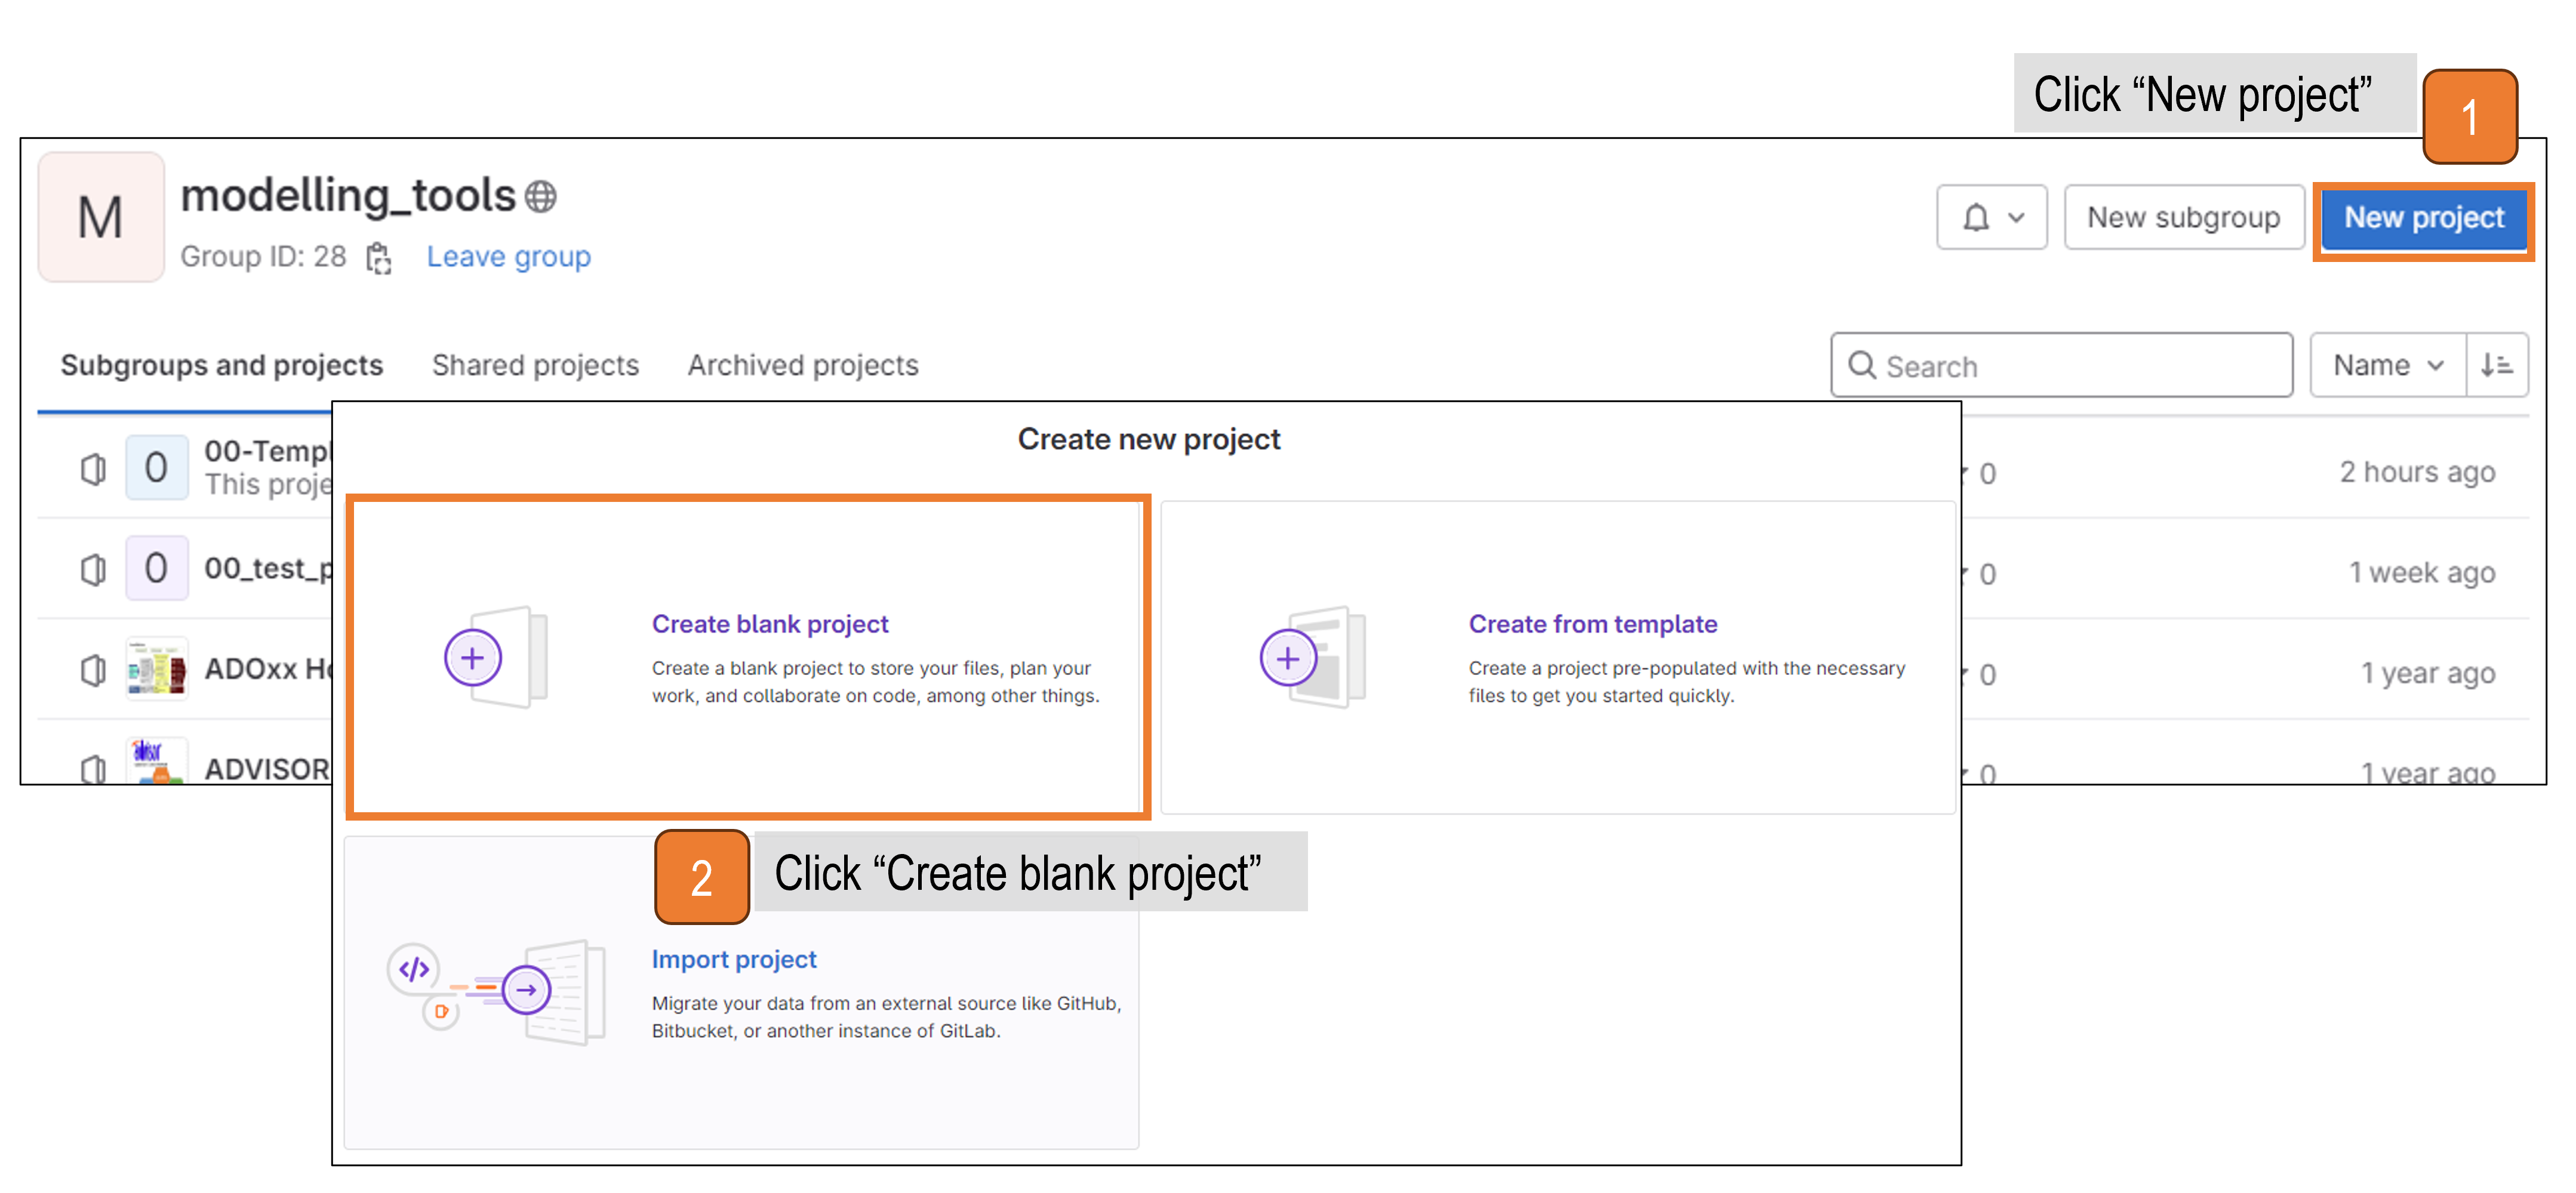 Create a blank GitLab project in the modelling_tools group
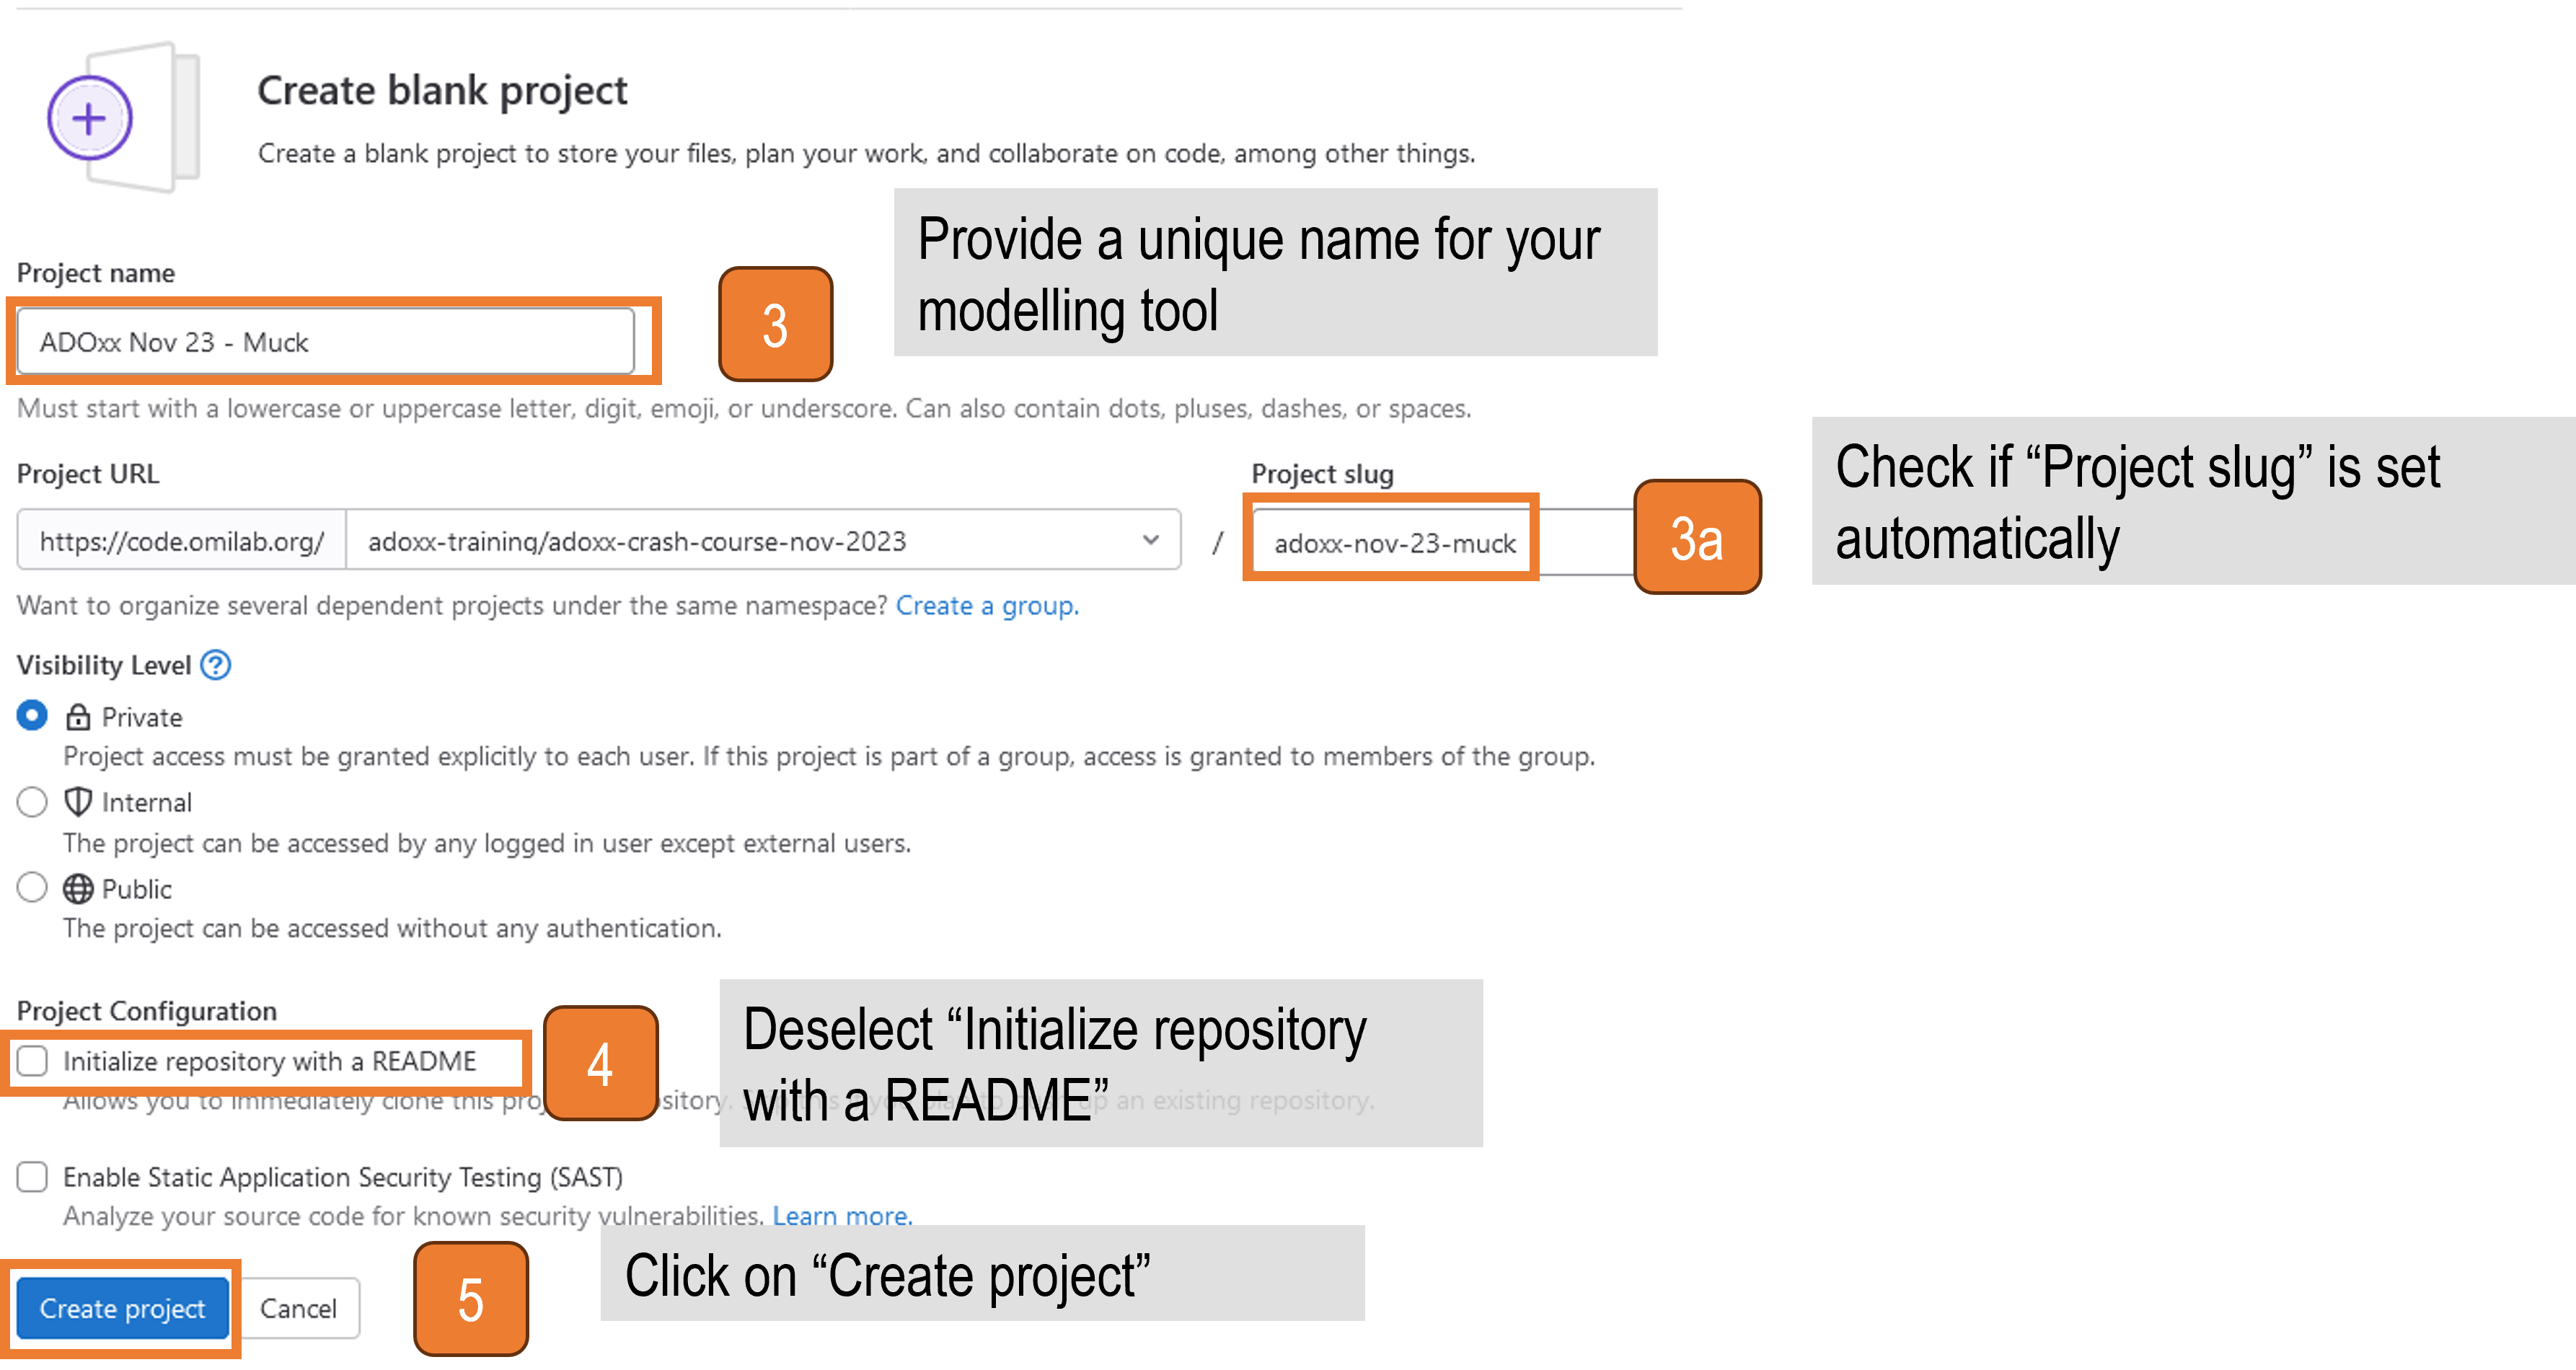 Provide the name for the new project
- Set Up the project structure
- Download the
gitlab-ci.zip: gitlab-ci.zip and unzip the file - Open the GitLab repository of your newly created project in the browser
- Click on
Upload File - Upload the unzipped
.gitlab-ci.yml - Click
Upload file
- Download the
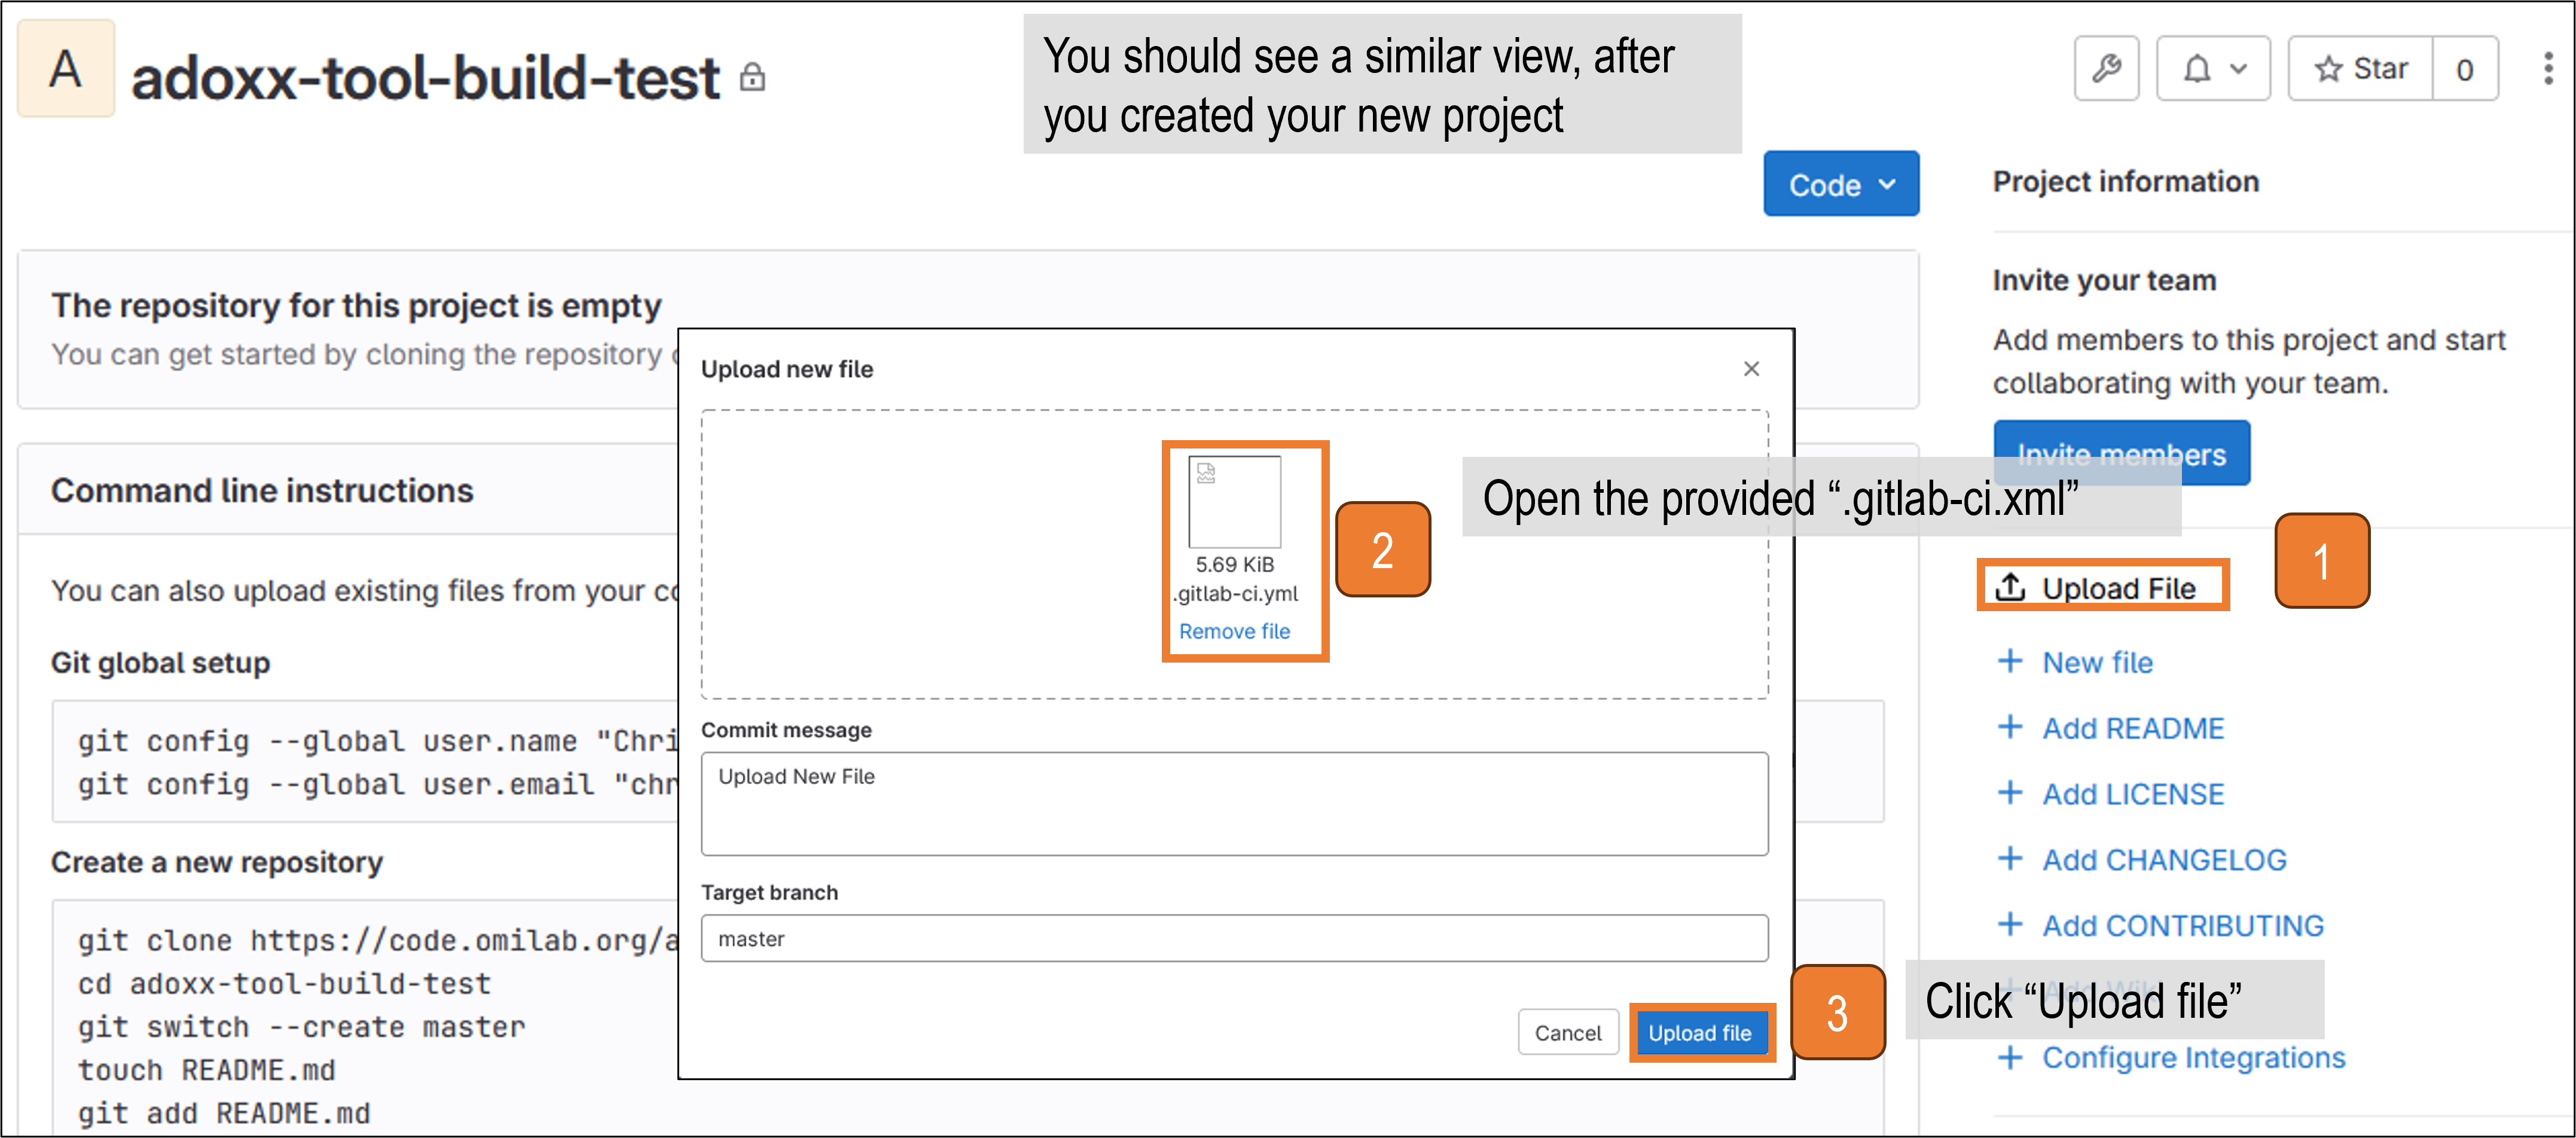 Upload the .gitlab-ci.yml file
Create the project structure
Attention: the
load_templatebutton is only available, if (part of) the structure is not yet available!- Click
Build
1a. ClickPipeline - There should be a job with status
Blocked
2a. Click onBlocked - Start
load_template(by clicking on the play symbol next to it) - Wait till the template is loaded
- Check if the template was loaded correctly
- Click
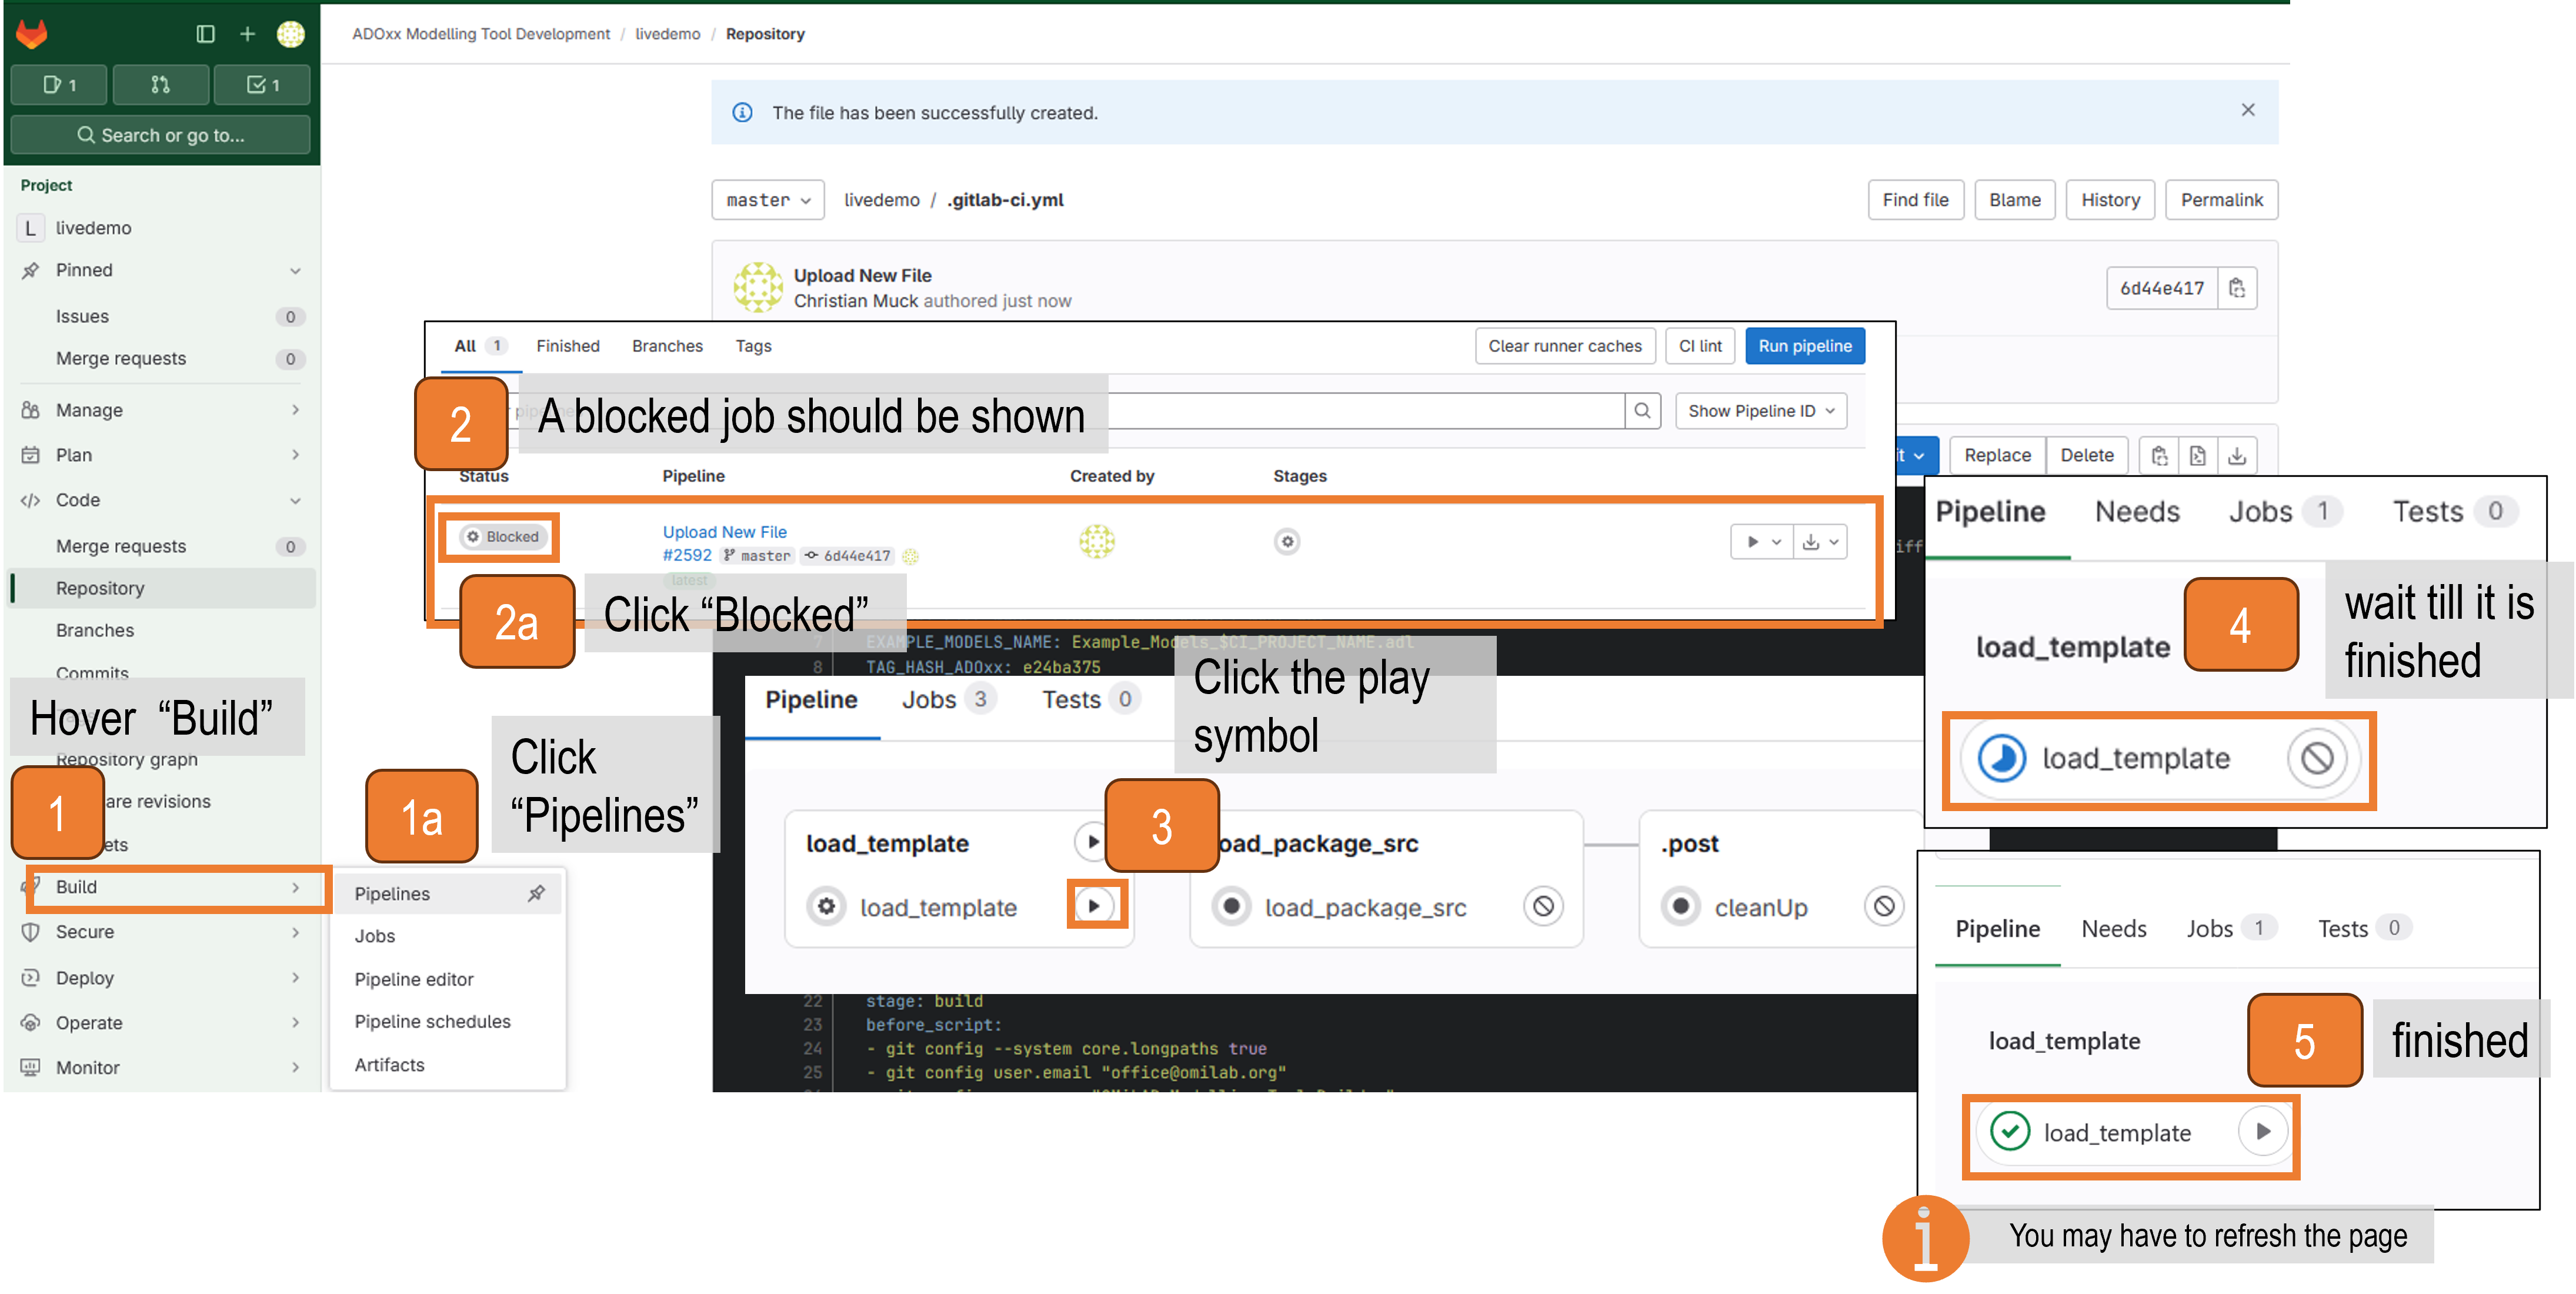
Load the sources for building the tool. After the template is loaded, the sources needed for packaging the tool can be loaded
Starting by the finishing interface of the previous step
- Click the play symbol next to
load_package_src - Wait till the task is finished
- Check if the packaging sources were correctly loaded
- Click the play symbol next to
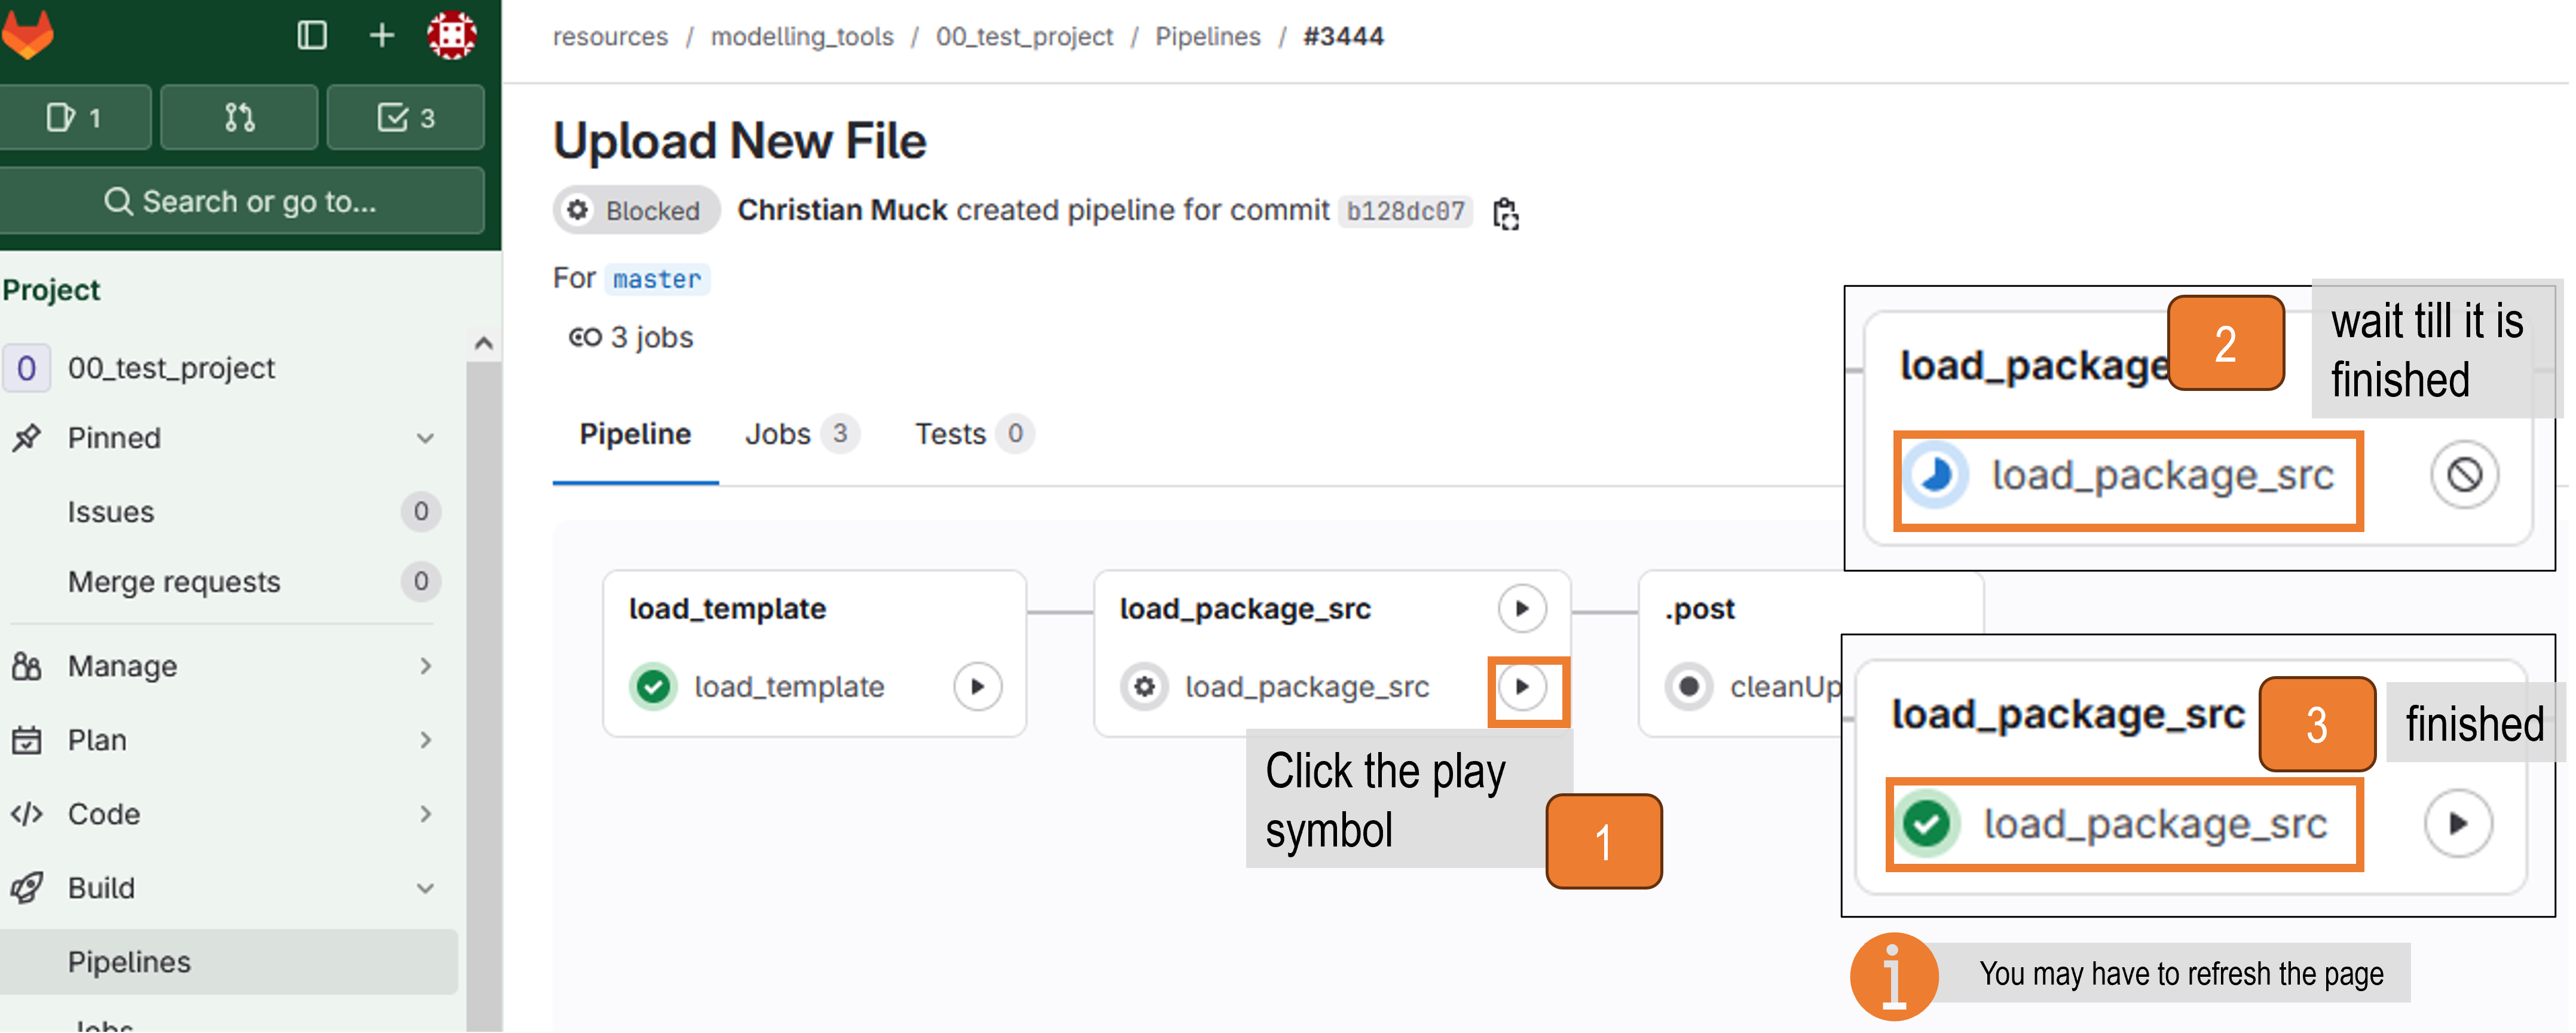
Preparation Migrating from ADOxx 1.5 to ADOxx 1.8
You can import your ADOxx 1.5 library file into ADOxx 1.8, develop and use it as with ADOxx 1.5.
More information on the changes from 1.5 to 1.8 can be found in the downloaded installation folder of ADOxx 1.8:
<SourceFolder>/doc --> for general information about the changes and the platform<SourceFolder>/doc/ADOxx CHANGELOG excerpt --> for overview of the changes
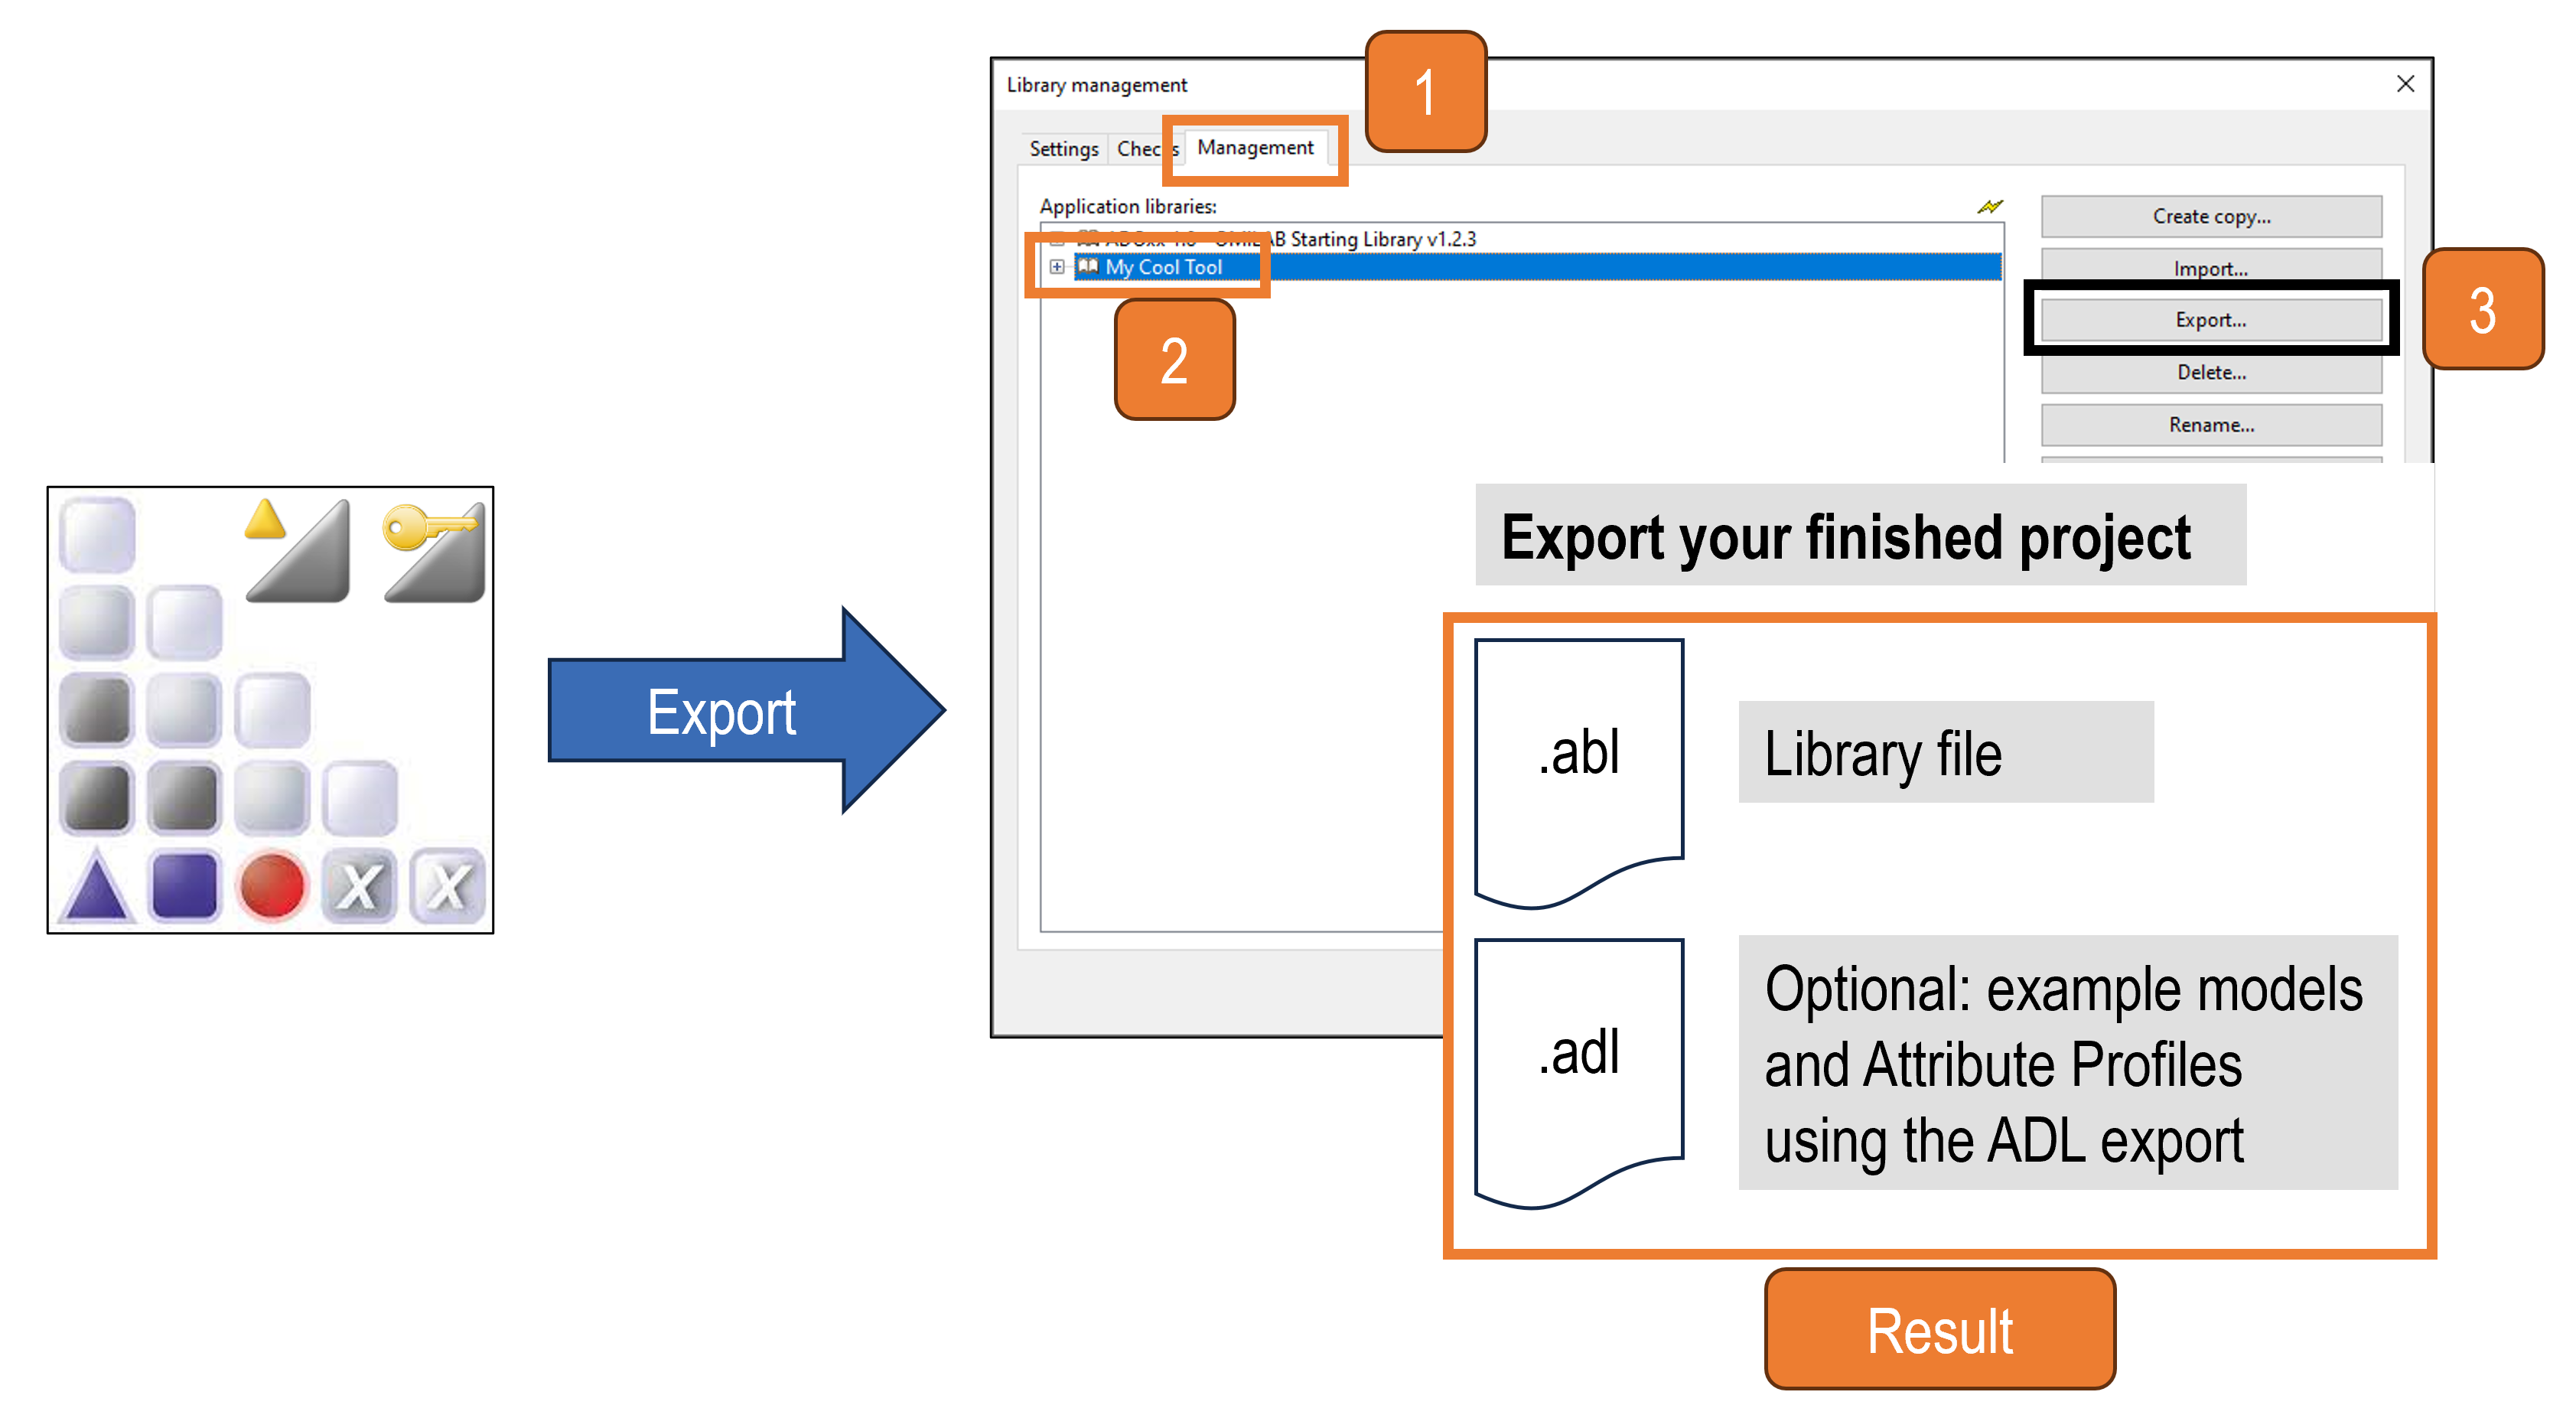
Adapt your modelling tool and all the needed functionality so that they work with ADOxx 1.8 and then export the new ADOxx library (.abl) file. If you want to provide example models with installation package of your modelling tool, please create these with ADOxx 1.8 and export them as .adl files. If there are any open questions, please do not hesitate to contact us at info@adoxx.org
- Login into your modelling tool repository at code.omilab.org
 Login and open your modelling tool project page
- Preparation for adapting the project structure
- Download the
gitlab-ci.zip: gitlab-ci.zip and unzip the file - Open your modelling tool project in the browser
- Upload the
.gitlab-ci.ymlfile to the root of your project (see figure below)
- Download the
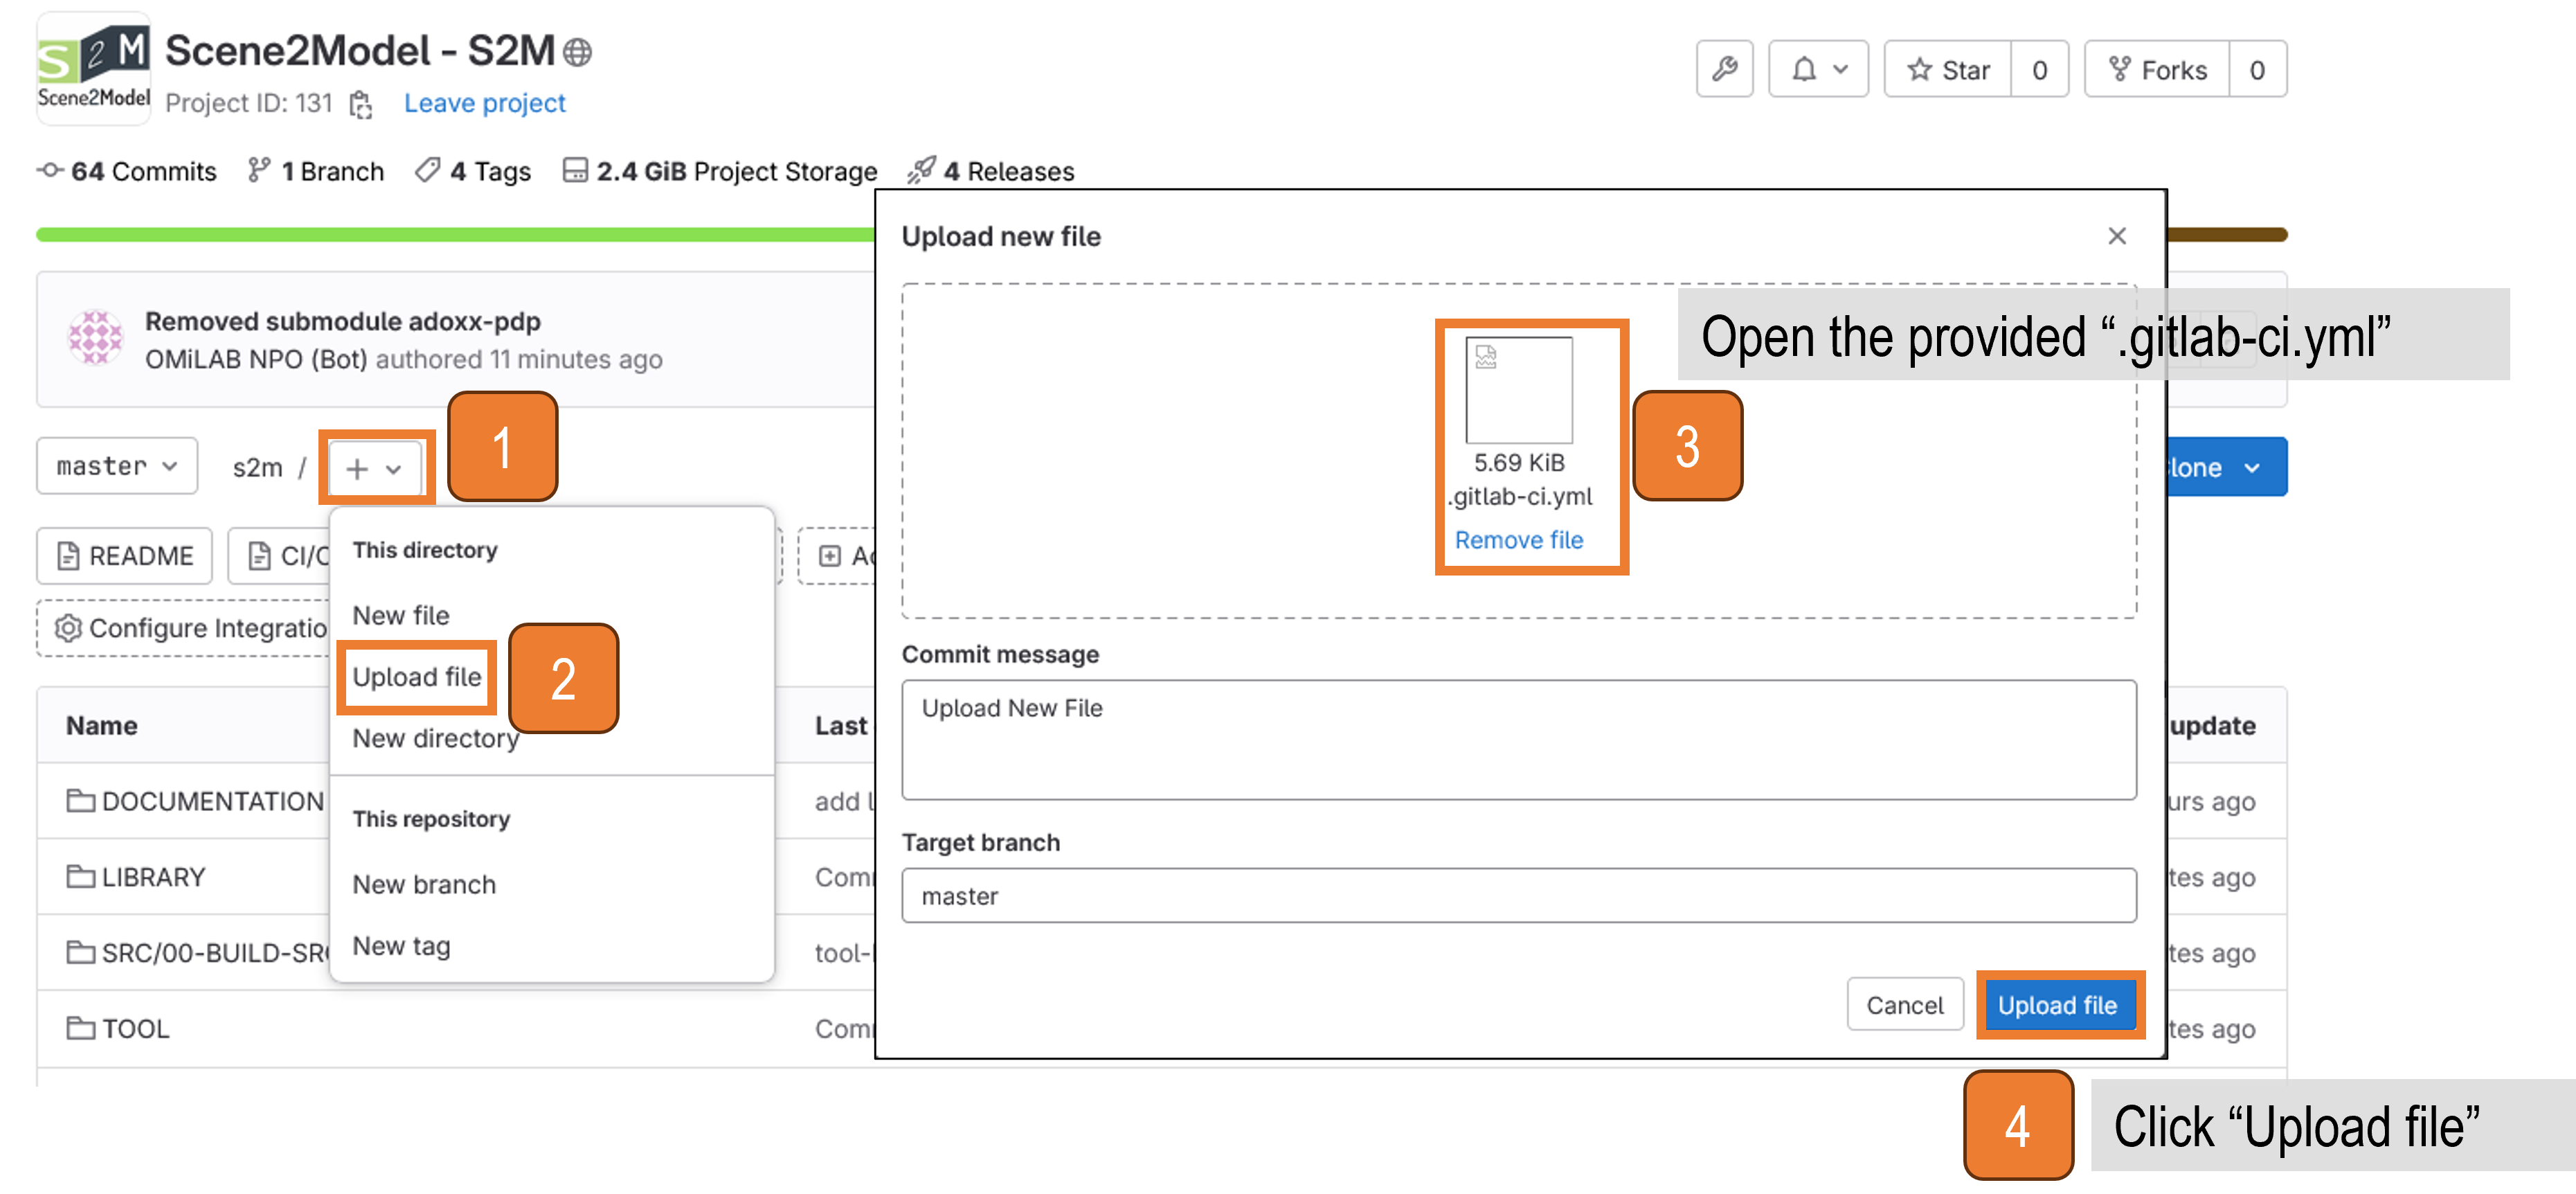 Uploading the .gitlab-ci.yml file to your modelling tool repository
- Open the CI/CD pipeline interface
- Click on
Build
1a. Click onPipelines
- Click on
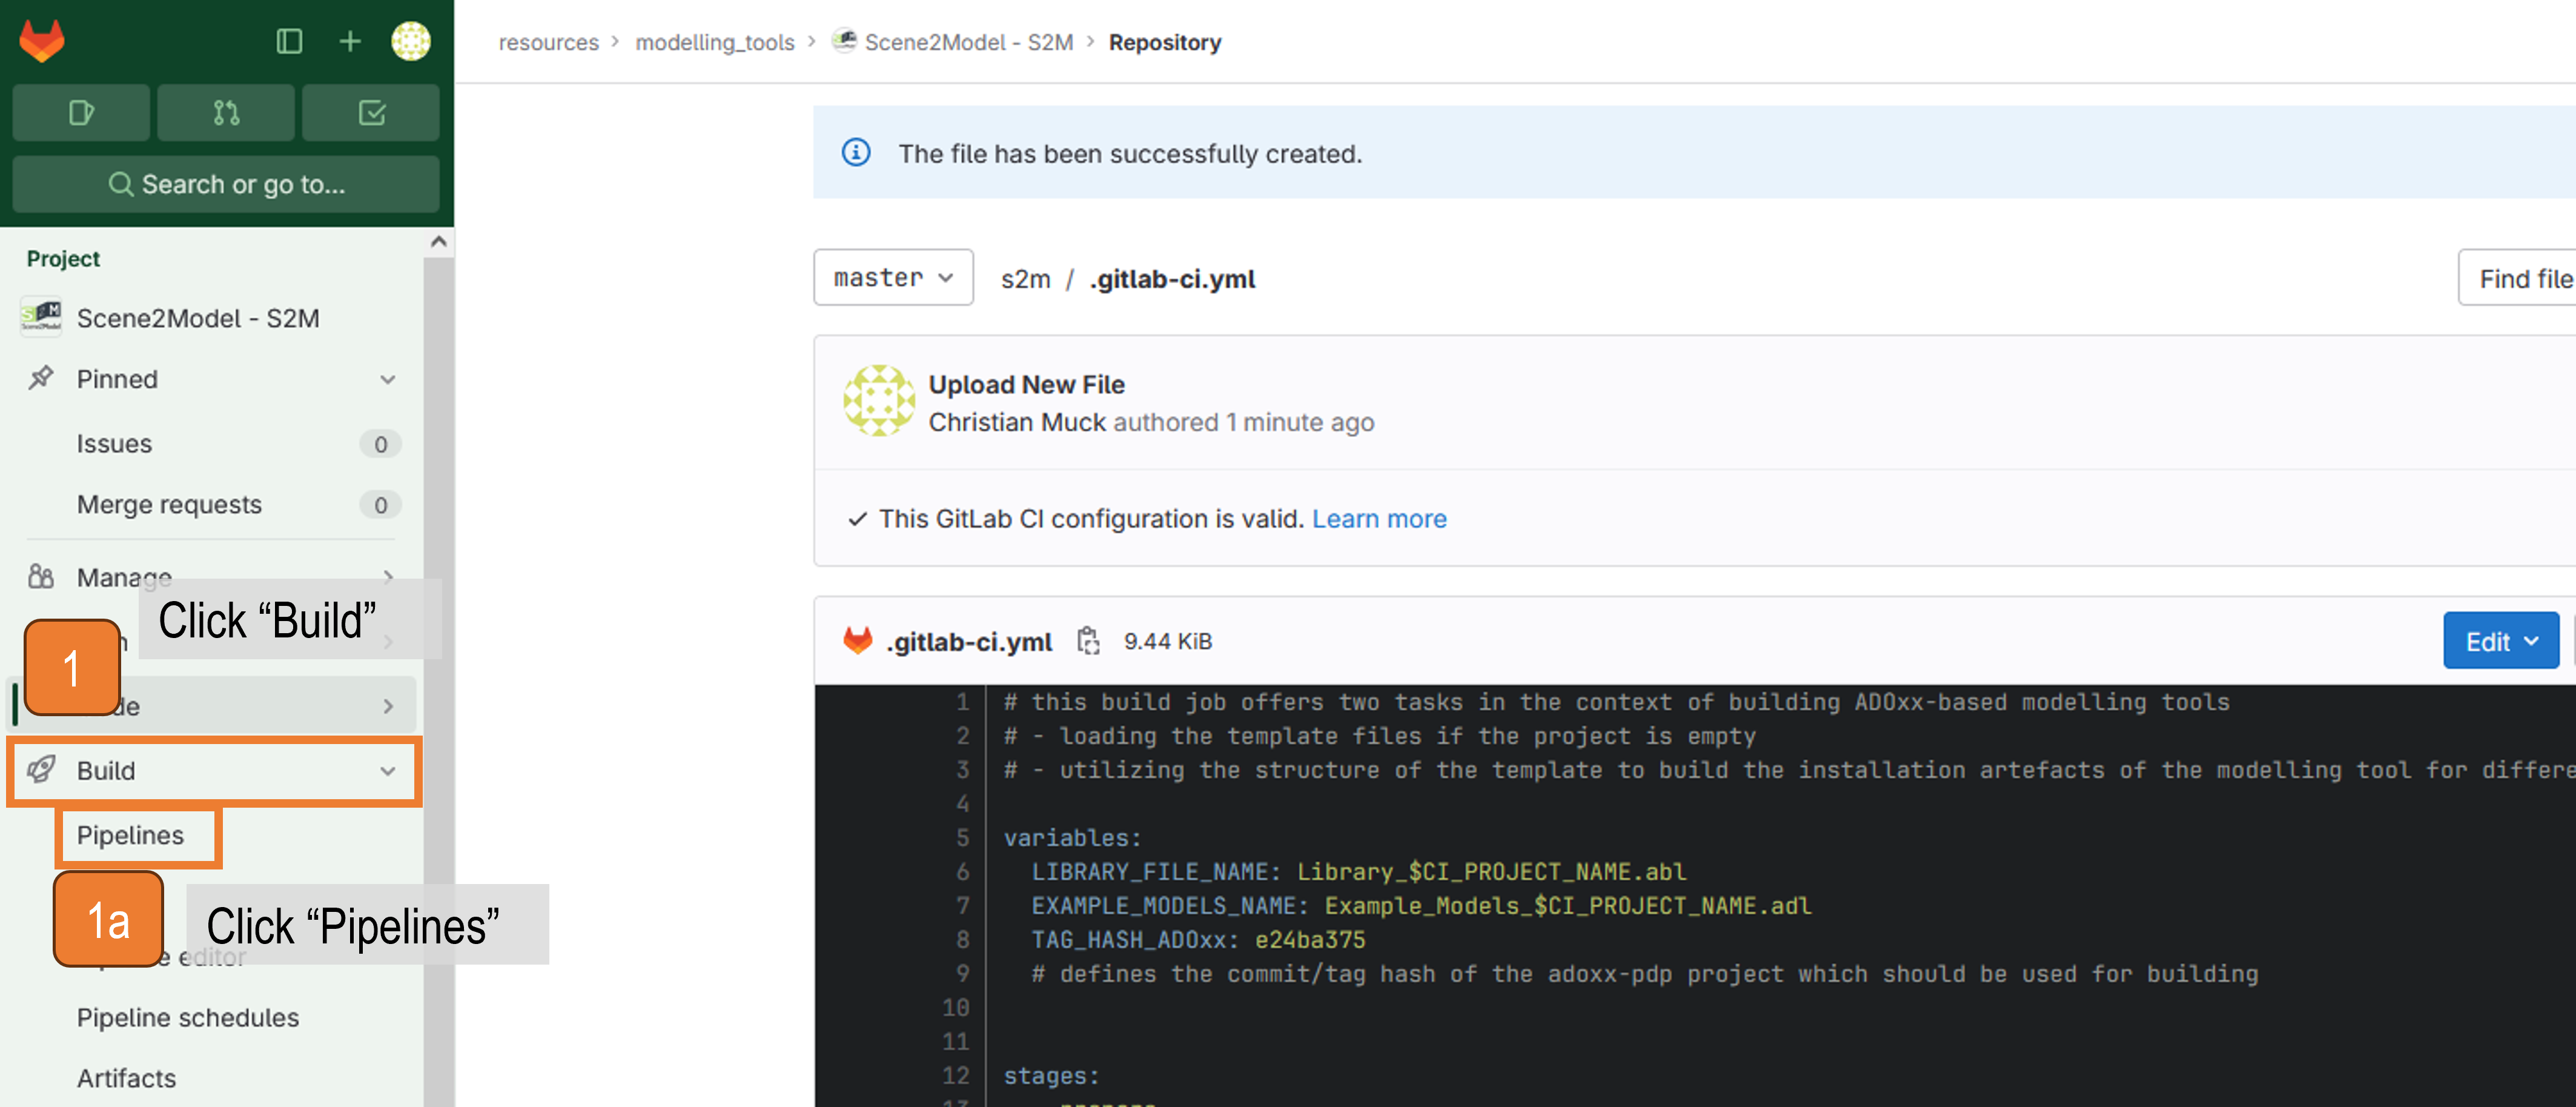 GitLab interface for opening the CI/CD pipeline interface
- Start loading the project structure
2. Click on theBlockedjob
3. Start theload_package_srcjob
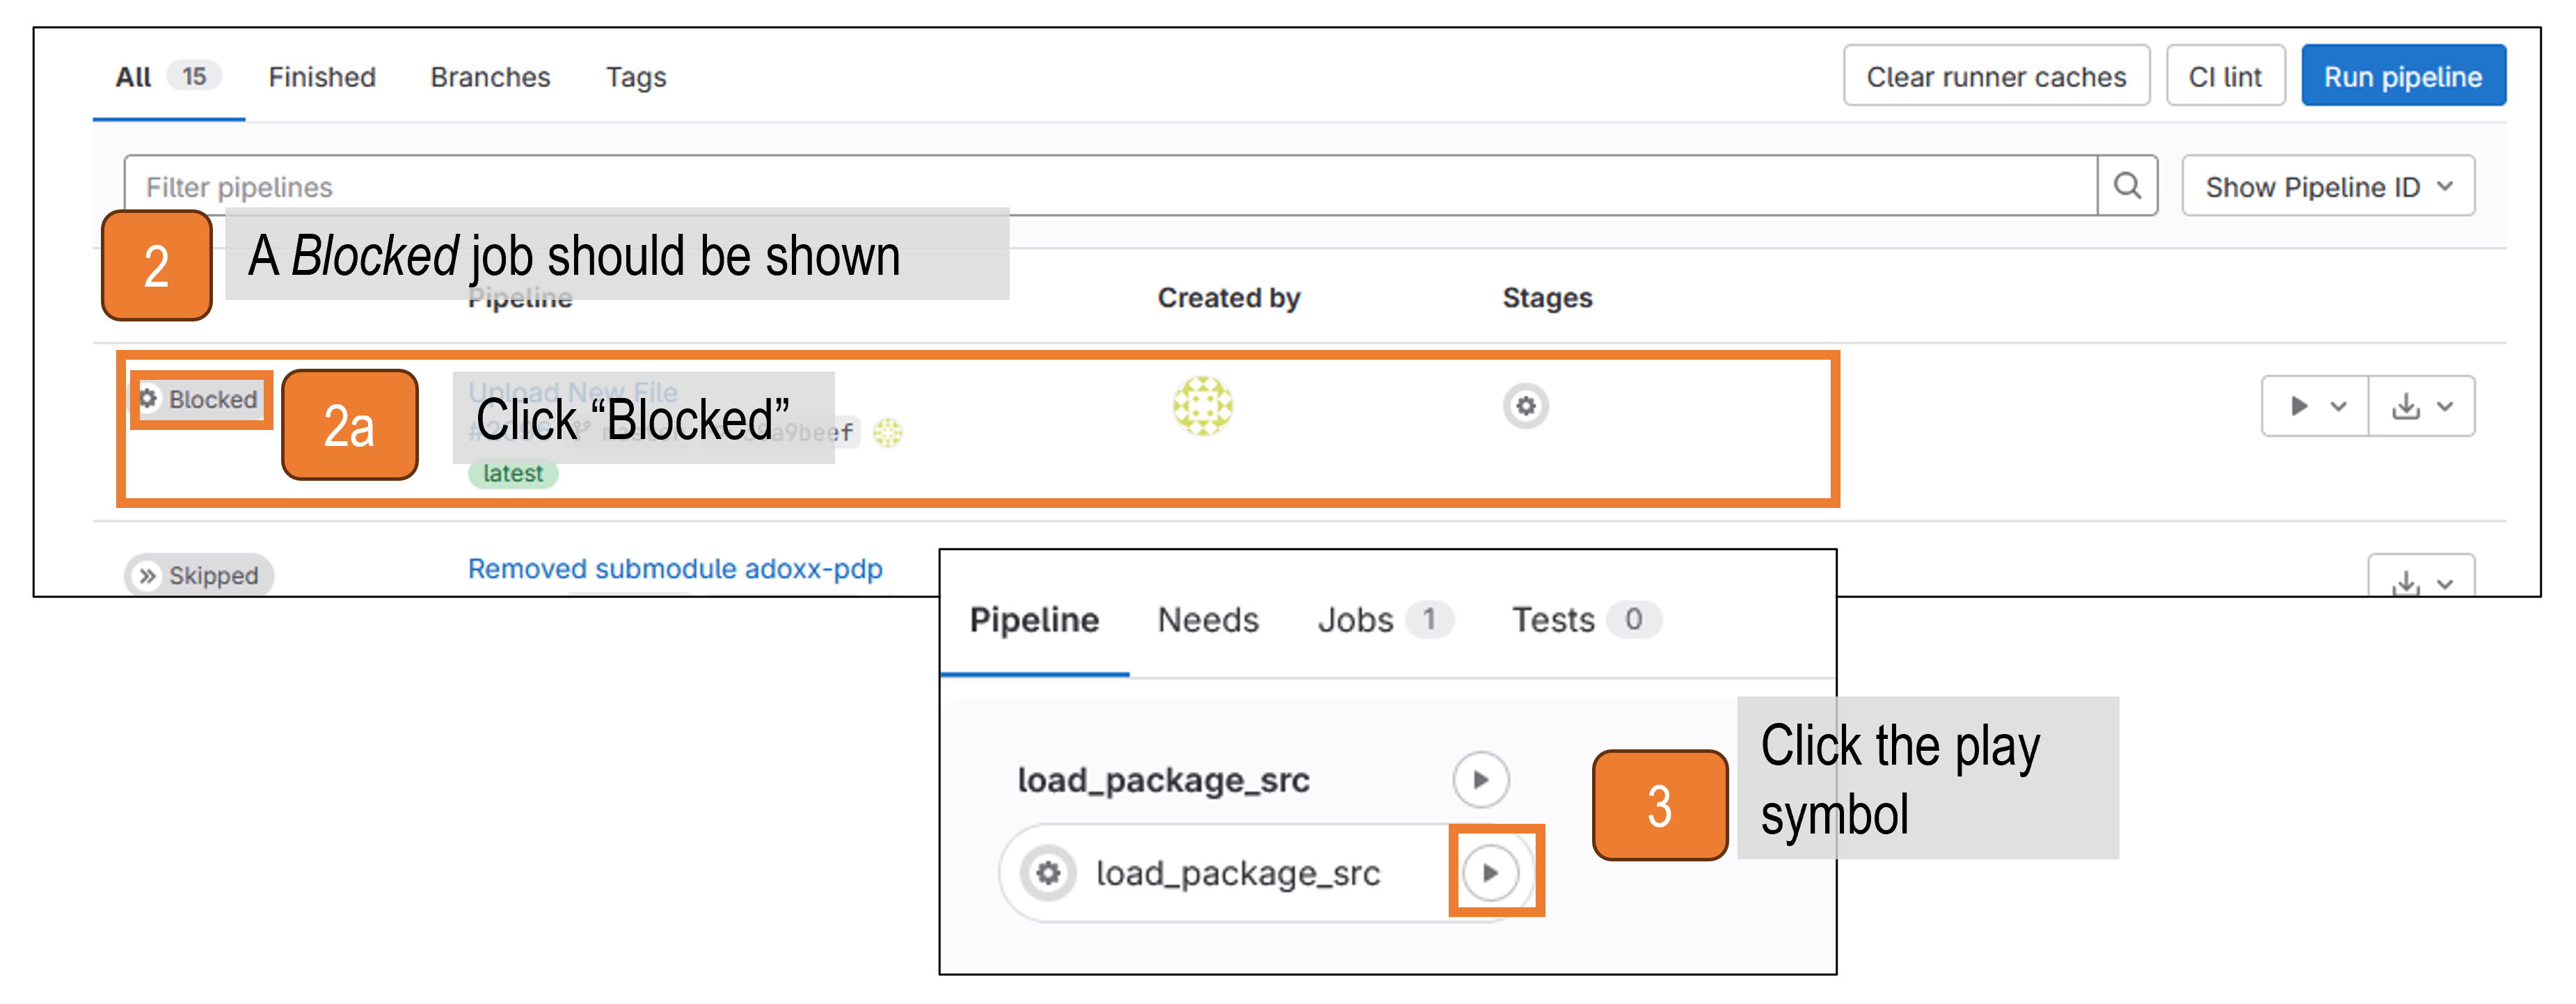 GitLab interface for starting the job to loading the project structure
- Wait till the template is loaded
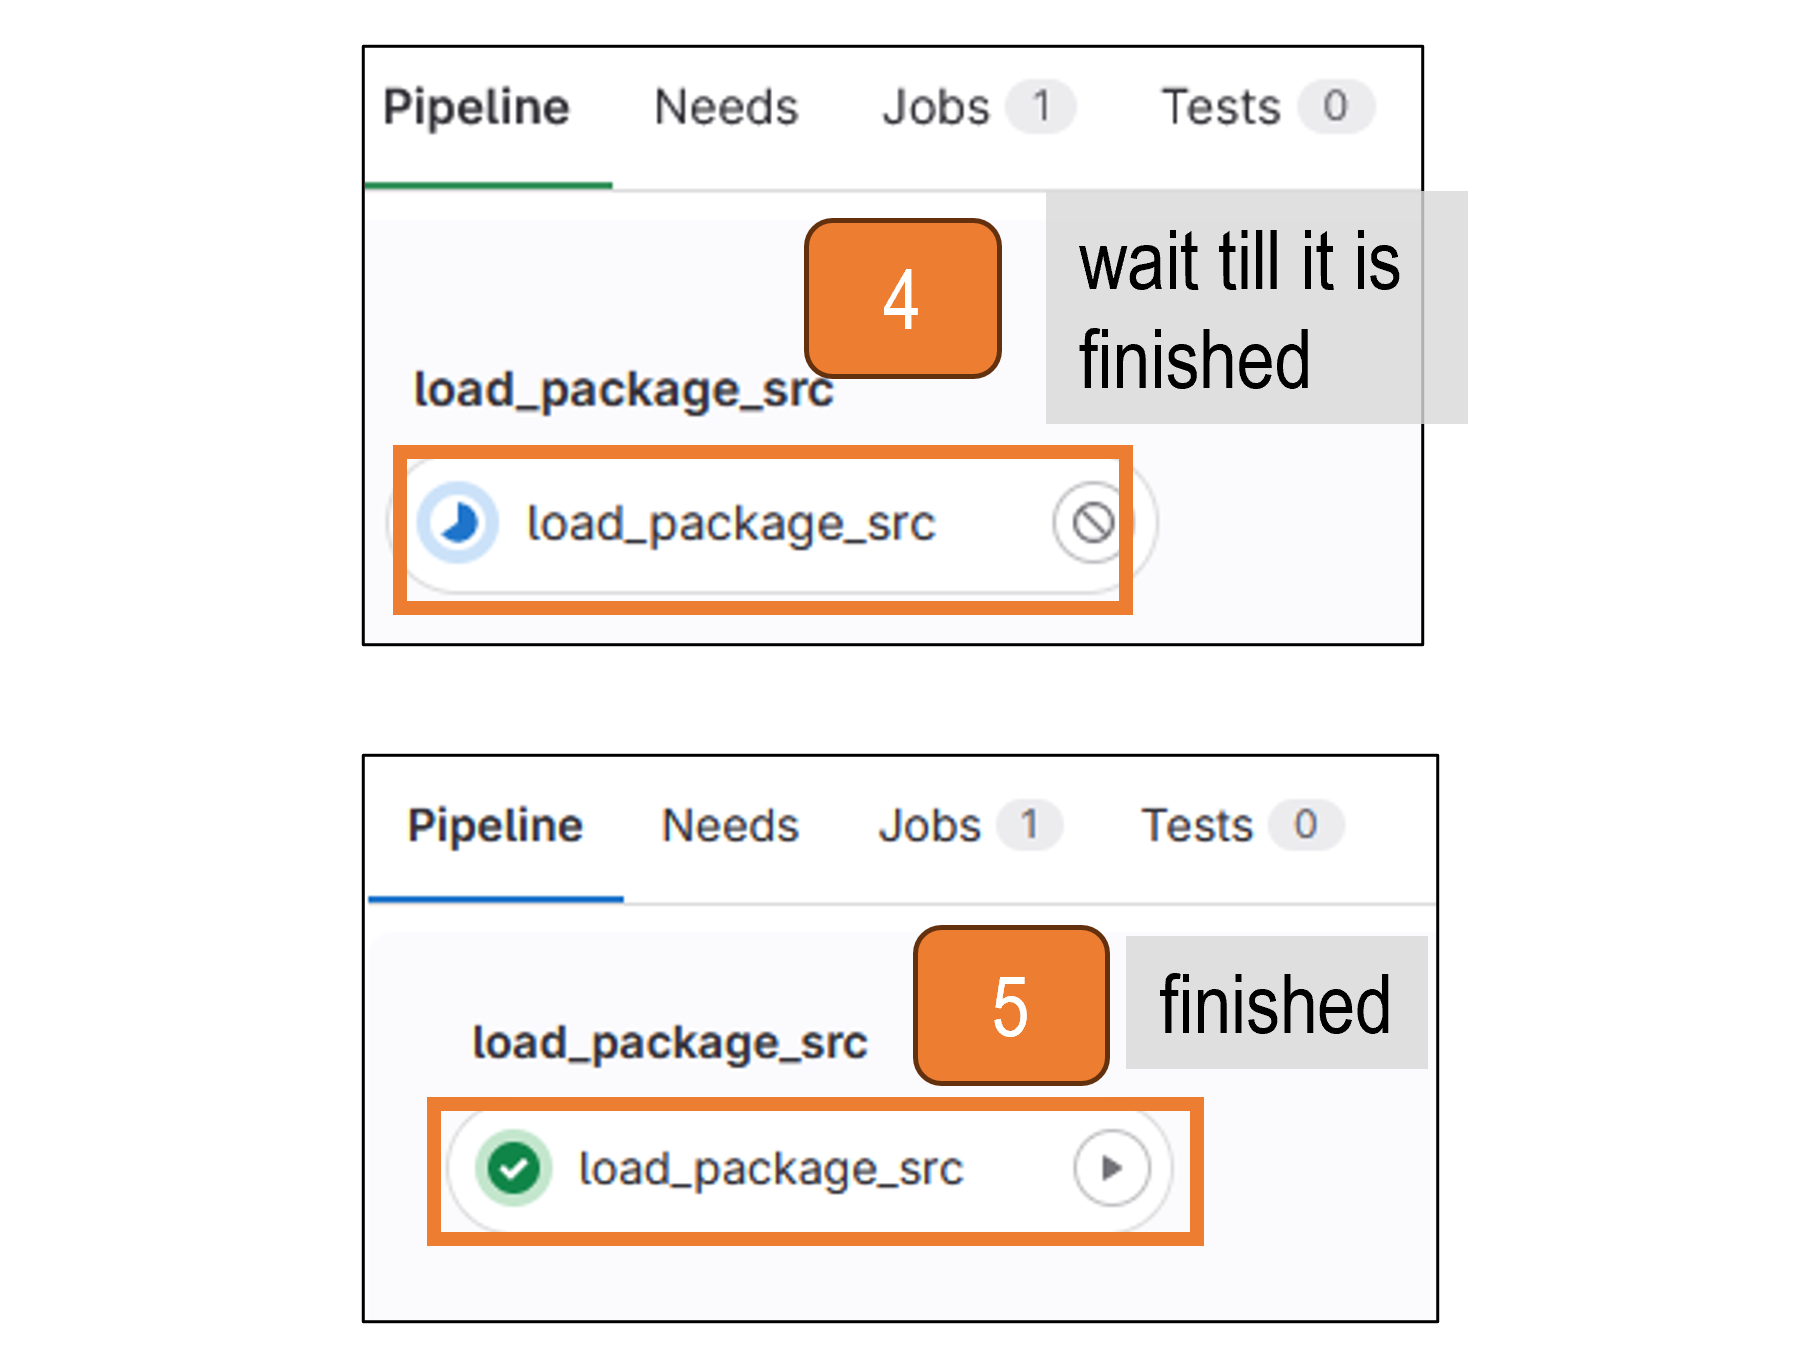 GitLab interface of the finished GitLab CI/CD job for creating the project structure